Maintaining Roses by Carolyn Williams

AgriLife Logo

Maintaining Roses is Easy

Maintaining roses is one of the easiest things to do in the garden. The trick is to select roses that do well in our climate, plant them at the right time, and give them enough light.

Best Time to Plant Roses
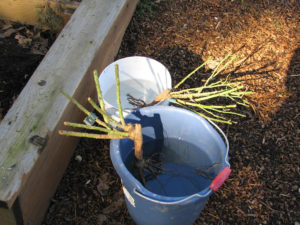
Bare root roses soaking in a pail of water

Give your bare root roses a good soak before planting them in the ground.

Most container roses, especially Earth-Kind® or antique, can go into the ground most anytime as long as they have supplemental irrigation. But the best times to plant roses in the Austin area are early fall through early spring. Roses need to establish roots before summer heat. Try to choose mild weather with a chance of rain showers to give the rose it’s best chance to survive and thrive.

Plant bare root roses, those that aren’t in a container, before the bud breaks appear. Depending on the weather, this is usually on or before February 14th. In an especially mild winter, it may be early January. The same rules apply to transplanting an established rose. Plant as early as weather allows so the roots have time to develop in time to survive summer heat.

Where to Plant?
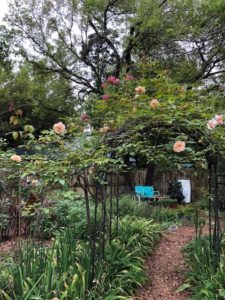
Reve d'Or rose

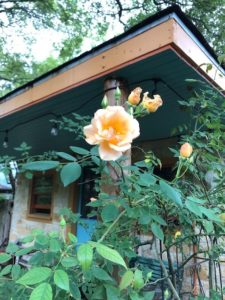
Roses need light to bloom. These Rev d’Or are in very bright dappled shade.

Roses need soil in order to grow sturdy canes and bloom prolifically. They also prefer at least four hours of sunlight or very light, dappled shade. Raised beds or berms are perfect for the Central Texas area as much of our soil is either thin or heavy clay. Be sure to have your soil tested. Most rose-growing advice includes the use of phosphorous fertilizers – which may be a horrible suggestion for the Austin area. Most of our soil already has excess phosphorous, which greatly inhibits iron and other micronutrient uptake. A soil test will tell you what you need for your specific location. No matter what, adding some compost and light mulch on top of the soil after planting and each subsequent year can really get your roses blooming.

Stay on Top of Weeding

Now that you’ve planted the roses, what needs to happen next? You’ll need to weed here and there to keep your roses from becoming smothered or having their light and air supply cut off. They need their space especially to keep air circulating through their branches. After weeding, watering is a good way to keep in balance. And, please remember, one shouldn’t be using a weed eater anywhere near rose bushes. No explanation needed!

How Much Water?

Many roses are fairly drought tolerant, but to perform their best and stay healthy, you’ll need to do some watering. Rainwater is always the best and even contains some nitrogen (from the electrical activity of lightening), but roses will take any kind when needed, just know they do not appreciate constantly wet feet.

Watering their foliage to blast off pests such as aphids and spider mites periodically is great, but make sure it is early in the day and leaves are not staying wet overnight as this is how the blackspot spores become established. Normally root watering, like drip irrigation, is best as it does not leave the foliage damp.

Know the Pests
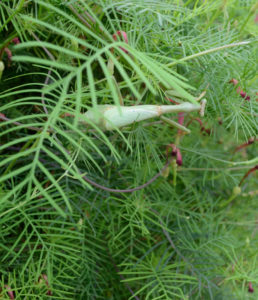
Mantid hanging out in the garden

Know your insects. This Stagmomantis sp. (Mantodea: Mantidae) is one of the good bugs.

In checking over your roses and seeing bugs, remember while there are bad bugs, there are also good ones. Arm yourself with as much knowledge as possible to identify each kind and then plan accordingly. Doing an internet search or having a good reference book or two on bugs is always prudent and a good practice. This site by Texas A&M Entomology is a good place to bookmark.

Additional Resources

Best Roses for Austin and Travis County

Solving the Mystery of Pruning Roses by Dr. Douglas Welsh

Earth-Kind® Roses

Old Roses by Dr. William Welch

Common Rose Diseases

The Organic Rose Garden by Liz Druitt, Taylor Trade Publishing (April 1, 1996)

Good Bugs for Your Garden by Allison Starcher, Algonquin Books (January 5, 1995)

Plant Problems and Maintenance

Heirloom Gardening in the South by William C. Welch and Greg Grant

February Gardening Checklist for Austin and Central Texas


Carolyn Williams blog author

Carolyn Williams and her husband live and garden west of Austin in the land of limestone and caliche. This will be her 21st year as a member of Travis County Master Gardeners Association, where she has held several offices including two years as President. Carolyn has chaired numerous committees , writes articles for the TCMGA Compost Bin, gives talks to local clubs and organizations, and is a certified Landscape Designer who always enjoys discovering the beauty and rhythms of her own garden.
Plant Freeze Recovery Tips from the 2021 Winter Storm

AgriLife Logo

Time to Remove Frost Protection

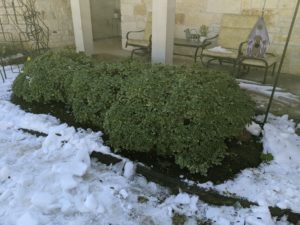
Recently uncovered shrubs, surrouned by snow

Remove protective covering once overnight freezing temperatures are no longer in the forecast.

Now that the record-shattering cold has left Texas, you now may be turning your attention to the plants in your landscape and wondering what you should do for freeze recovery.

I walked around my neighborhood on the first day after the big thaw and was surprised to see so little damage. But my neighborhood is young’ish (I’ve been in my home 12 years), so the trees are all relatively small–no huge branches to break under the weight of ice and snow. Many cacti and Agave are mush, but I saw a few Cycads that appear to be undamaged.

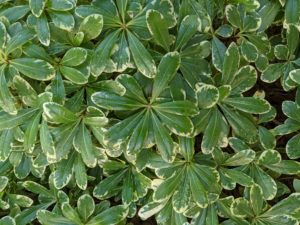
Glossy leaves of Pittosporum shrub

The leaves of this plant appear glossy due to the moist cold, but they are not damaged internally, and will recover just fine.

In my own yard, I had only covered one set of shrubs, three dwarf Pittosporum, which I nervously uncovered once the forecast no longer listed any chance of overnight freezing temps. Their leaves looked a bit iffy, with an odd sheen that, in some plants, can indicate that the cell walls have burst and the water is going to leak out with thawing temps, leading to a pile of mush. But I’ve seen that in these shrubs in prior freezes, and knew that was nothing to worry about.

Remove Only Broken Stems or Branches for Now

Prune off only damaged sections

Prune out only broken stems or branches.

The problem that I discovered, as happened with many plants, was that the weight of the snow and ice on top of the blankets and tarp I’d used to protect them from the freezing temperatures had broken some of the stems. A sad sight, as my cherished plants will now have gaping holes in their beautiful bodies, but a problem that I can help them overcome, with some proactive pruning. But for now, the only pruning I’m going to do is to snip off any of the stems that are actually broken.

Freeze Danger Not Over

It will be hard to be patient, but that really is the best course of action–leave all plants alone, even the mushy ones, and wait to see how they respond, or don’t, as temperatures continue to warm. The only freeze recovery maintenance to do now is to remove only tissues that are broken or hazardous. One reason for this is that damaged tissue at the tips of growing points or on the outside of plants can serve to protect the plant if we get another cold-snap. Prune off damaged tissue now, and you’re simply exposing a new part of the plant to damage if we have a late season frost or freeze.

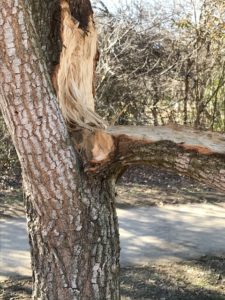
Broken tree branch from recent winter storm

Prune only branches that are broken. Wait to see how the plant recovers in the next few months before taking other measures.

It Looks Terrible, But Leave Alone

Tip of plant with frost damage but it may do freeze recovery on its own

Resist the urge to trim away damaged tips or leaves. 

New growth and the tips of stems are the most sensitive to frost damage. It’s tempting to just remove it as a way to tidy up for freeze recovery, but leave this tissue alone. Once the plant begins to grow out of this damage you’ll be better able to gauge where to prune. With deciduous plants, still dormant and leafless, you don’t have any good way of knowing how much the plant was damaged. Wait until the new buds begin to swell up and emerge from under the surface of the stem.  Once the new buds or growth appears, prune off any obviously dead tissue.

Give Plants a Chance to Recover

Are some plants actually dead? Absolutely. But I think most people will be more surprised by what recovers. With all of this damage, plants may be hard to come by this spring. So my best advice is not to make a hole in your landscape until you can fill it. Even dead plants can provide temporary food and shelter for wildlife.

Additional Resources

Frosts and Freezes

Weather

Monthly Gardening Calendar

NOAA

February – the Rose Pruning Month by Carolyn Williams

AgriLife Logo
Roses in a vase

Bottom: ‘Duchesse de Brabant’; Middle: ‘Souvenir de la Malmaison’; Darker pink: ‘Maggie’; Top: ‘The Fairy’

Here in Central Texas, February is the month of on-and-off nasty weather, Valentine’s Day, and Presidents’ Day. All of these remind me it’s time to check on my roses. Choosing a mild day in Mid-February and arming myself with the necessary clothing (long sleeve shirt, hat, glasses, heavy gloves and no open toed shoes) I’m off to start the rose pruning process.

Check your Tools First

Before I start my rose pruning, I like to sharpen and then sterilize my clippers and pruners. Because you use your clippers/pruners so often, the blades can become dirty, rusty and carry bacteria that can then infect healthy plants. If you need help with this, search for the phrase “tool time care for pruning shears” on YouTube.

Know Your Rose

Know what kind of rose you are growing as each can have a little different need. In the Austin area, the best roses to grow are Earth-Kind® and/or Antique roses simply because they have been tried and tested for our area soil and climate.

Rose blooms fall into two types of cycles: single bloom and repeat bloom. Single blooming roses usually bloom once in spring. Repeat bloomers also bloom primarily in spring, but then keep blooming all the way through to frost. If you don’t don’t know which you have, skip pruning until you can determine the bloom cycle.

Rose Pruning Steps

If your rose blooms only once in the spring, wait until it has finished blooming before pruning.

Apricot crepescule rose blossom

Crepuscule, a noisette type climbing rose, should be pruned after it blooms.

The first step to pruning is to remove all dead or damaged canes and any that are crossing over another cane on the inside of the bush.

Second, lightly trim remainder of bush by removing about 1/3 of it’s outer growth.

Third, prune to shape or correct the growing pattern, especially if it’s interfering with walkways.

Fourth, prune out overcrowded inside canes to promote good air circulation. This helps to prevent black spot and other fungal and bacterial problems and reducing the need to spray.

When pruning, look for a bud that faces to the outside on the cane. This will focus new growth to the outside of the bush instead of to the inside. Remember to always pick up and discard any clippings, unless you wish to propagate them.

Deadheading and Summer Pruning

Don’t worry about precision pruning. In fact, sometimes roses seem to thrive with almost no cutting back at all. Most roses reach a peak of bloom about six weeks after pruning, because they bloom on the resulting flush of new growth. Here in Austin, repeat bloomers can be pruned lightly in August for fall blooms.

Should you “dead-head”? After a large flush of blooming, dead-heading (cutting off the spent or dead rose) can both look tidy and increase the next blooms to appear. Many gardeners find this type of activity therapeutic and calming (much like weeding.) It’s not necessary, especially if having the time to constantly dead-head is not available.

Rose hips tied in a bundle

Rose hips are packed with vitamin C

One disadvantage to constantly deadheading is that you might not know which varieties form “hips.” Hips are the fruits of the rose and provide visual interest in your garden.  Additionally, hips make tasty jams and tarts that are filled with lots of Vitamin C.

Compost After Pruning

After pruning, whether spring and late summer, compost is very welcome by your rose. Add a few shovels of wonderful compost around the base of the rose at the dripline and work it lightly into the soil above the roots.

Fertilize With Caution

If your soil test indicates it, add fertilizer after rose pruning. Obtaining a soil test is very important to ascertain the available phosphorus. Austin area soils are normally high in this nutrient, so the standard advice to add phosphorus to promote blooms may not apply to your garden. Excess phosphorus will limit the availability of other important soil nutrients, even if it’s an organic fertilizer.

Additional Resources

Best Roses for Austin and Travis County

Solving the Mystery of Pruning Roses by Dr. Douglas Welsh

Earth-Kind® Roses

Old Roses by Dr. William Welch

The Organic Rose Garden by Liz Druitt, Taylor Trade Publishing (April 1, 1996)

Heirloom Gardening in the South by William C. Welch and Greg Grant

February Gardening Checklist for Austin and Central Texas


Carolyn Williams blog author

Carolyn Williams and her husband live and garden west of Austin in the land of limestone and caliche. This will be her 21st year as a member of Travis County Master Gardeners Association, where she has held several offices including two years as President. Carolyn has chaired numerous committees , writes articles for the TCMGA Compost Bin, gives talks to local clubs and organizations, and is a certified Landscape Designer who always enjoys discovering the beauty and rhythms of her own garden.
Plant Freeze Protection from Arctic Blast

AgriLife Logo
blankets on plant to protect from freeze

Make sure that the entire plant is covered and that the covering reaches the ground and is weighted down

Plant Freeze Protection in Abnormally Cold Weather

Like most gardeners, I pay particular attention to the weather, combining observation and information to make a plan for garden maintenance. Usually, that decision-making process involves adjusting to excessive heat and drought. I’m downright vigilant about the heat. But the cold? Making plans for plant freeze protection? Well, I don’t really think too much about it. Like many Central Texans, I’ve grown a bit complacent about cold weather, not having seen much of it in the last decade.

But when the weather professionals give the type of forecast that involves the arrival of an arctic blast and mentions the polar vortex? I take notice. Normally, I don’t take any special care of my garden in the winter. Some of my plants end up with a bit of frost damage every year, but they grow out of it just fine, needing only a bit of minor pruning in early spring. But when I hear a forecast with the potential for several straight days below freezing and a short dip into single digits? Even a lazy gardener like me takes action.

Quick Pointers for Plant Freeze Protection

There are plenty of references and publications on how  to protect your plants from the cold, but if you don’t enough time to search out information, here are are a few pointers from my own yard.

Move containers indoors

Move container plants indoors to protect from freeze

Move container plants indoors to protect from freeze

If at all possible, move container plants indoors or into the garage. If you can’t move containers indoors, go ahead and toss a blanket over the entire plant and its pot, and weigh it down on the ground so that the entire plant and the container are protected.

Don’t use plastic for plant freeze protection

You know all those old sheets and worn out blankets that you’ve been meaning to donate but just haven’t? Now is their time to shine! If the fabric is heavy, be sure to use a stake or garden tool to prop it up, so the weight doesn’t break the stems. Avoid using plastic to protect plants from a freeze. Plastic in contact with leaves may cause them to rot, providing an opportunity for microbes to move in.

Batten down the hatches for plant freeze protection

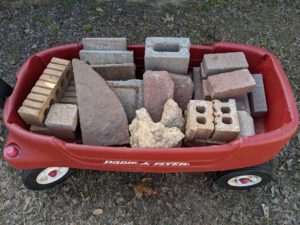
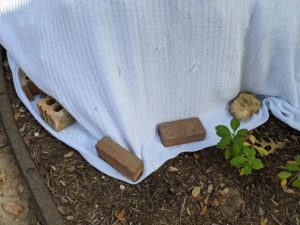
It’s critically important that you secure the protective covering to the ground around the base of the plant. This will not only keep the cloth from blowing away, but will also keep cold air from blowing up under the fabric and damaging your plant. Use any objects that you happen to have. This is a good time to raid that rock pile in your backyard, or grab that broken stepping stone that you haven’t tossed yet.

Use bricks, rocks, broken pavers, etc. to weigh down plant coverings

Bricks, broken paving stones, and even rocks work great to secure freeze protecting fabric around your plants

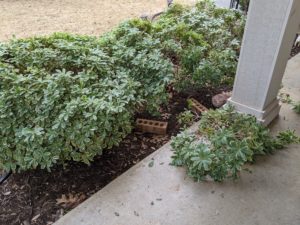
Bricks and a rock holding down a blanket protecting a plant from freezing weather

Be sure that the fabric is weighted down and secure, so that the entire plant and the ground around it are protected

Remove coverings once temperatures are back above freezing

This week’s crazy cold will necessitate leaving fabric coverings on for several days. During the cold snap, be sure to check regularly to make sure that the fabric is still completely enclosing the entire plant and that it’s still weighted to the ground. But then, once the cold snap breaks and our weather returns to above freezing, go ahead and remove that covering.

Be very careful if you use any sort of lights to “heat” the area around your plants

A precious plant may be hard to replace, but not as hard as a home damaged by fire from an electrical short. If you aren’t sure that the electrical situation is safe, please err on the side of caution.

Questions?

If you have specific questions, get in touch! Master Gardener volunteers are manning our help desk remotely, and we’d be happy to chat with you by phone or email:  512.710.7098 or travismg@ag.tamu.edu

Additional Resources

Frosts and Freezes

Weather

Monthly Gardening Calendar

NOAA


The History of Roses by Carolyn Williams

AgriLife Logo

Rosa sulfurea drawn by the great botanical artist Pierre-Joseph Redouté (1759-1840 )

Roses Cultivated for Over 5,000 Years

The history of the rose goes back around 5,000 years ago to China. There is fossilized evidence of the rose plant eons earlier. The Romans grew them, the English fought a war symbolizing them, (white rose of York and red rose of Lancaster.) The French Empress Josephine Bonaparte became an early collector and breeder of them at her estate, Château de Malmaison, outside of Paris.

Cultivated roses were introduced into Europe from China in the late 18th century.

Roses in North America

In early America, the indigenous people of the Pacific Northwest were growing native roses for medicinal purposes such as poultices, teas, and tonics.

When the New England colonists came to North America they found the native roses appealing. They also had brought their favorite Old Garden Roses to introduce into the New World. Eventually, rose imports from Europe traveled by ship into early American ports such as New York, Charleston and Savannah.

In 1803 Thomas Jefferson had cultivated roses in his garden at Monticello, sending native rose seeds to a friend in France.

Rose Classification System

You will find roses listed together in “classes.” Developed originally by rose nurserymen and refined by generations of rose growers, the class system is a convenient way to organize roses into groups of plants that are both similar in appearance and in need.

Old Garden Rose Classes

Rose breeders and collectors introduced more than ten thousand rose varieties between 1804 – 1935. This makes it difficult to identify older roses found growing in cemeteries, abandoned homesteads, and long-established gardens.

Species and Hybrid Species

Species roses are those grown from wild stock. Their natural range is anywhere between the Arctic Circle and just above the Equator. An local example is the Cherokee Rose, which grows naturally in several Southern states.

China Roses
Mutabilis rose displaying white, yellow, and pink petals

Mutabilis

The original roses in this class came from China. European rose breeders then bred the plants with other classes. They were the first ever repeat-blooming roses. Their flowers have a characteristic sweet, fruity fragrance and bloom constantly. Examples: Old Blush, Ducher, Archduke Charles, Martha Gonzales, and Mutabilis.

Teas
A pink tea rose, Duchesse De Brabant

Duchesse De Brabant

Tea roses are typically large bushes featuring blooms with a slight “tea” fragrance. These roses are found often in Southern gardens as they do well in zones 6 – 10. Many of the old gardens had several types such as Mrs. B. R. Cant, Mrs. Dudley Cross, Duchesse De Brabant and Madame Antoine Mari.

Noisettes

Hybrids of Chinas and Teas. Bred in Charleston, So. Carolina and further developed in France. Enjoying a warm climate especially zones 7 – 10. Examples: Nachitoches, Lamarque and Reve D’Or.

Bourbons
The Bourbon Rose named 'Maggie'

Maggie

Named for the French ruling class and again, a hybrid of Chinese and European varieties. Large and richly scented, growing to zone 9. Dr. William C. Welch from A&M University found one of the best in Louisiana, Maggie. Other examples: Souvenir de la Malmaison & Souvenir de St. Anne’s.

Modern Garden Rose Classes

Moving into more modern times, many new classes have evolved, often blending one or more of the old varieties. Hybrid Teas, Polyanthas, Floribundas, Grandifloras, Hybrid Musks, Hybrid Rugosas, and Miniatures. The list continues to grow as nurserymen and rose specialists continue their love of the rose.

Share What You Know

Ron and Don from Travis County Master Gardeners

Founding Travis County Master Gardeners Association members Ron Miller and Don Freeman in 2004

Two wonderful, knowledgeable Master Gardeners helped me on numerous occasions learn more about roses.  They shared their expertise with anyone interested and always with a smile.  Now they are both gone, but certainly not forgotten by many.

Following in their footsteps, we all can learn that by sharing our gardening advice,  we enrich others. 

Thank you, Don Freeman and Ron Miller!

Additional Resources

Best Roses for Austin and Travis County

Earth-Kind® Roses

Roses – The Southern Garden this page is the hub for many of Dr. William Welch’s Gardening articles

Common Rose Diseases

The Organic Rose Garden by Liz Druitt, Taylor Trade Publishing (April 1, 1996)

Heirloom Gardening in the South by William C. Welch and Greg Grant

February Gardening Checklist for Austin and Central Texas


Carolyn Williams blog author

Carolyn Williams and her husband live and garden west of Austin in the land of limestone and caliche. This will be her 21st year as a member of Travis County Master Gardeners Association, where she has held several offices including two years as President. Carolyn has chaired numerous committees , writes articles for the TCMGA Compost Bin, gives talks to local clubs and organizations, and is a certified Landscape Designer who always enjoys discovering the beauty and rhythms of her own garden.
Please Participate in TexasSpeaks Survey

AgriLife Logo

TexasSpeaks survey

TexasSpeaks is being conducted in Travis County and across the State of Texas to allow the citizens of Texas to provide their input on the assets and issues in their communities. The local branch of the Texas A&M AgriLife Extension Service has a rich history of providing educational programs that address the most critical issues in the county, and invites your participation in the TexasSpeaks process.

The AgriLife Extension Service highly values the opinions shared through the TexasSpeaks community assessment. The expectation is that the assessment will take about 10 minutes.

You can provide your input by going to the following tx.ag/texasspeaks or by scanning the QR code below.
Texas Speaks QR code

What is the Goal?

Quick Facts About the Survey

Engage as many Texas citizens as possible to create the most accurate and helpful data to support Texas communities at both the state and local levels.
  • Online
  • Anonymous
  • Takes approximately 10 minutes or less
  • This survey is part of several efforts to identify and understand the issues facing Texas communities
  • Identifying relevant issues is fundamental to the program development model of Texas A&M AgriLife Extension Service
  • Includes an open feedback section for areas not listed within the survey
  • Includes an opportunity to elect to receive contact by the agency
Track the progress here: https://texasspeaks.tamu.edu/ Questions? Contact:
Dr. Scott Cummings
s.cummings@tamu.edu

The Texas A&M AgriLife Extension Service is a statewide network of professional educators, trained volunteers, and county offices. It reaches into every Texas county to address local priority needs and to extend the latest research to the people of Texas. Some of the major efforts are in mitigating drought impacts; conserving water use in homes, landscapes, and production agriculture; improving emergency management; enhancing food security; and protecting human health through education about diet, exercise, and disease prevention and management.

 Thank you very much for your involvement in this process.

TEXAS SPEAKS SURVEY

Texas Speaks Flyer

In the February Vegetable Garden by Patty Leander

AgriLife Logo

Last Chance to Plant Cool Season Vegetables

Your February garden checklist should include your last opportunity to plant cool season vegetables. They need to have a chance to mature before the arrival of hot weather. It’s also a time for hard decisions. If we fill our garden beds with broccoli, lettuce and carrots this month, where will we put tomatoes, green beans and squash next month?

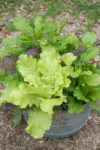
Greens grown in containers save space in garden beds

Grow cool weather greens in containers to save valuable space.

With the exception of quick-growing radishes and mesclun greens, the vegetables we plant in February will take 2-3 months to reach harvest size, taking up garden space until April or May. As tempting as it is to fill our gardens this month it would leave us with a dilemma in March – our prime time for planting warm season vegetables. A little planning and decision-making now on your February garden checklist will help keep the garden season moving along.

Create a Plan

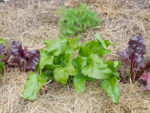
Tomatoes and Beets intercropped

Beets growing at the edge of this bed will be harvested well before the tomato overtakes the space.

Make a list of what you want to plant, note the expected planting and harvest dates, and then look at your garden space and map out a planting plan. You may decide to forego that row of broccoli now in favor of green beans which can be planted in early March. Or perhaps you plant beets along the edge of a bed so you have room for tomatoes in the center, or grow lettuce and carrots in containers to free up valuable garden space for cucumbers.

Sketch it out on paper and pencil in what will go where with approximate planting dates. It’s a good feeling to have a plan in place and it’s a terrible feeling to realize that you don’t have room for a favorite tomato unless you pull up broccoli that is just starting to form a head.

February Garden Checklist

Here is the vegetable gardener’s checklist for February:

Fertilize

  • Fertilize every 2-3 weeks with a liquid fertilizer or fish emulsion.
  • If you are growing tomato transplants indoors be sure to fertilize them regularly to encourage strong, stocky growth and make sure they get plenty of light. If they have outgrown their pots move them up to a larger size.

Water

  • Water plants during dry periods.

Plant

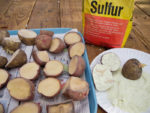
  • Plant potatoes this month for harvest in late May or June. Cut seed potatoes into egg-sized pieces, making sure each piece has at least one eye. Dust the cut sections with sulfur or expose them to air for a few days to heal over before planting.
    Dust potatoes with sulfur to prevent disease

    Dust potato pieces with sulfur before planting to help prevent disease.

    Potatoes should be planted in a trench about 10-12 inches deep and one foot apart. Cover the potatoes with 3-4 inches of soil. As the stems emerge continue to cover with soil, leaving just the tips exposed. Potato tubers will form along the stems that are buried below the surface.

  • Check the viability of older seeds before spring planting. To do this lay 10 seeds from the same packet on a moist paper towel and fold it over to cover the seeds. Place in a plastic bag, label with the date and place in a warm location. Check the seeds every few days until they have sprouted. If 8 to 10 seeds sprout then you can assume the seed from that packet has a good percentage of viability. If only 2 or 3 seeds sprout it may be time to buy new seeds.

    Test seed viability by sprouting in a moist paper towel

    Sprout seeds in a moist paper towel to check for viability.

  • Add some flowers and herbs in and around your garden. Now is a good time to plant alyssum, petunias, snapdragons, dianthus, calendula, dill, cilantro, thyme, borage, oregano and fennel.

  • Plant basil seed indoors for transplanting after the weather is warm. There’s a basil for every palate, from classic Italian to spicy Thai to cinnamon scented basil with pretty lavender blooms.

Soil

  • Take advantage of mild days to amend garden soil with 2-4 inches of compost in preparation for spring planting.

Maintenance

  • Root crops – carrots, beets, radishes and turnips – should be thinned so plants are 3-4 inches apart. Overcrowding may prevent the roots from reaching their proper size.
Plant herbs for near year-round enjoyment

Plant herbs and flowers now to enjoy for months to come.

Additional Resources

Recommended Vegetable Varieties for Travis County

Vegetable Seed Sources

Vegetable Gardening in Austin

Sustainable Food Center Farmers Markets

Texas Farmers Markets

Monthly Gardening Calendar for Austin and Central Texas

In the Vegetable Garden with Patty G. Leander


Patty G. Leander is a contributing editor for Texas Gardener magazine and an active member of the Travis County Master Gardeners Association with an Advanced Master Gardener specialty in vegetables. She has been growing vegetables year-round in her Austin garden for over 20 years, encouraging the use of sound, horticultural principles that will lead to a bountiful harvest.

Compost Treasure Hunt Time! by Yvonne Schneider

AgriLife Logo

Winter is Compost Prep Time

A red oak that has shed its leaves to be gathered up by gardeners for compost

Thin leaves, such as those from Red Oaks and Bradford Pears, decompose quickly.

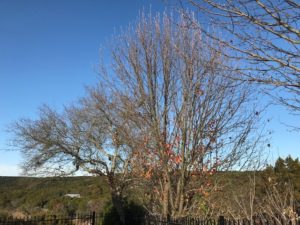
You might consider winter a gloomy season with the trees shedding their leaves and perennials wilting with the cooler temperatures. But for gardeners, it’s compost treasure hunt time! This is the optimum time to begin gathering the ‘brown’ material needed for composting throughout the next year. My relatives (and husband) think I’m crazy about this time of year, as I scoop up as many leaves as possible, ask family to bag up their excess leaves, and volunteer to clear-off and bag-up my Mom’s driveway in Houston. Her yard is a treasure trove of several pine trees and white oaks whose leaves and needles make wonderful compost.

Storing Browns for Compost

My favorite leaves to store for compost are the larger thin leaves, such as the Red and White Oak leaves, as they decompose very quickly. While pine needles take a little more time to decompose, I love the acidity it adds to my compost since I live on the Edwards Plateau and have alkaline soil. The pine needles are a freebie to aid in neutralizing the PH in a few areas where I want to grow roses. Although Live Oak trees are more plentiful around Austin, their leaves are thicker and tend to take longer to decompose. But if that is what you have, then definitely use them.

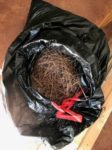
Pine needles gathered for compost

Pine needles take longer to decompose but can help add soil acidity.

I recently invested in a shredder which can reduce leaves and twigs to 1/16 their original size. Therefore, I can take several large bags of leaves and still have one large bag left over to store. Shredding the leaves greatly reduces the decomposition time and helps to better manage the moisture level of the compost. But shredding is not necessary, especially if using the thinner leaves of the Red Oak. The next big event for collecting ‘browns’ for the compost is in February and March when we cut back the dead and wilted perennials.

Recycle for Greens

Table scraps ready to be turned into compost

Common vegetable table scraps become ‘greens’ for composting.

A great recycling practice is to use your table scraps for compost which ultimately benefits your yard. A ‘green’ in compost is any non-fat, non-meat or dairy item. I use any vegetable or fruit scrap, used coffee grinds (including the filter), and eggshells. Rinsing out the egg white skin helps to alleviate any creatures from invading the compost bin. At my house, we have a pail for the weekly addition to the compost bin. A good rule of thumb is to cut up items to a size no longer than your finger since smaller pieces decompose faster. Crush items like eggshells to aid their decomposition.

My husband and I often battle over who gets the watermelon or cantaloupe rinds as he likes to feed them to the roaming deer, and I love them for the compost. Our agreement is that whatever the deer do not eat in the first day goes into the compost. And the recycling is therapeutic, as I now worry less about over-buying vegetables or greens, as anything wilted still has value for the compost. Interesting enough, I find that I often have more green components for the compost than brown, thus my new focus on bagging browns for future use.

Compost Bin Selection

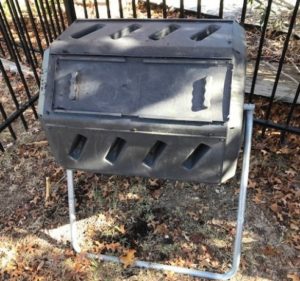
Compost tumbler

Tumbling Composter with two area, one to add materials and one to allow to ‘cook’

I began composting just 2 years ago and continue to learn with every batch. Being a beginner and living in an area with lots of wildlife, I chose the tumbling-type of composter to avoid potential invasions by the night critters. The downfall of this type is the small amount of compost in each batch, but definitely a good size for a small household. My initial attempts took longer to process, as I realized I had plenty of table scraps (greens) and not enough brown (dead) material. A good rule of thumb is 3 times the number of browns to greens, but you’ll know you’ve got the right mix if there is no odor and the decomposition is progressing every time you check. If you do smell decaying food or other odor, you need to add more browns.

Compost Troubleshooting

If the pile is not decomposing or doesn’t appear to be hot, you may need more greens or moisture. It’s good to turn (and check) your compost once a week. Turning the compost incorporates air into the process and allows you to check on the moisture content. If the compost feels like a wet (not soggy) sponge, then the moisture level is good. If it looks dry, then it’s time to add water. I normally wash out the greens bucket and use that water to add to the compost. After all, the insects and worms doing the hard work of decomposition need to drink too!

How to Use the Compost

Finished compost ready to spread in the yard

Compost is ‘ready’ when dark brown, has an earthy smell, and original material is no longer recognizable.

One batch of compost in the tumbler makes 2 to 3-gallon pails of compost. This amount allows the spreading of a smaller raised bed, or garden area. I cycle from one bed to another or use the compost to enrich the soil in an area I’m planning to cultivate in the future. In the summer when the temperatures are warm, a compost batch can ‘cook’ in as little as six weeks. In the middle of winter, it takes closer to 3 months since my tumbler is small and it’s harder to keep the batch hot (a minimum of 130F for 3 consecutive days is required to reduce pathogens and seed pods). When I see that all the original components are no longer identifiable, and there’s an earthy smell to the compost, I know the batch is ready.

Topic of Conversation

The fact that you’ve chosen to compost will be a topic of discussion with the family and in future gatherings. It’s a great activity for the family to participate in and become increasingly aware of the amount of food and yard waste that can add value to your garden. Conversations at our home start when guests ask why we’re keeping vegetable peelings and wilted lettuce leaves. Just this New Year’s, my sister-in-law asked if I wanted to take home all the outer cabbage leaves she wasn’t planning to use. I think you can guess what my answer was. I accepted with a huge smile and said ‘SCORE!’

Additional Resources

Soils and Composting for Austin

Calculate How Much Compost or Mulch You Need

Leaf Management Plan

January Gardening Checklist

Yvonne Schneider, guest blogger

Yvonne was a 35+year veteran in the computer and information technology industry when she retired and moved from Houston to the Austin area. In 2018, Yvonne certified as a Travis County Texas Master Gardener to follow her passion for gardening and volunteering within the community. She has spent 20+ years enjoying gardening and working with bulbs and perennials. She now tackles the challenges presented by the Austin area wildlife, drought, and limestone soil.

The 2021 Drought to Deluge Austin Gardening Programs

AgriLife Logo

Learn from Gardening Experts

wildflowers are a mainstay to gardening in Austin

If you’re gardening in Austin, sometimes it feels like everything is conspiring against you. The weather, the soil, the topography, and the number of pests and diseases can overwhelm even the most experienced gardener. Help is on the way!

Travis County Texas A&M AgriLife will be hosting several programs in 2021 to help Austin area gardeners be more successful. Topics range from Planning and Design to Vegetable Gardening.

The program features experts from Texas A&M University, AgriLife Extension, Travis County Master Gardeners,  and the Wildflower Center. The focus is on the seven principles of xeriscaping as featured in the publication: From Drought to Deluge, The Resilient Central Texas Garden. The program also has two sessions on growing fruit and vegetables.
All Programs are Virtual
From Drought to Deluge book cover

The programs utilize an online webinar format with advance registration. The webinar capacity is 100 attendees, so please register early and sign-in on time. Participants will be able to submit questions to the speakers before and during the presentations.

The individual webinars will be posted on the Travis County Texas A&M AgriLife event calendar. You can get notified once the event links are available by subscribing to email notifications, or just by visiting the Events Calendar on the website. Events are also typically featured on the Travis County Horticulture home page.

Past Webinars in the Drought to Deluge Gardening Series

You can find links to all available recordings on Our Favorite Gardening Resources page.

  • Restore. Reimagine. Reinvent. Prairie Landscapes for Austin with John Hart. Broadcast Date 2/9/2021
  • Homeowner Landscaping Plans: Site Documentation and Analysis with Sandy Stone. Broadcast Date 2/19/2021
  • Homeowner Landscaping Plans Design & Construction with Sandy Stone. Broadcast Date 2/26/2021
  • Soil Nutrient Management with Dr. Jake Mowrer. Broadcast Date 3/2/2021
  • Practical Lawns – Turfgrass Management with Water In Mind with Dr. Chrissie Segars. Broadcast Date 4/8/2021
  • Drought to Deluge: Water-Wise Ways with Kirk Walden. Broadcast Date 5/25/2021
  • Vegetable Gardening in Central Texas with Sheryl Williams. Broadcast Date 6/15/2021
  • HOA Entrance Makeover with Jo Anne Hargraves. Broadcast Date 8/4/2021
  • Epic Tomatoes from YOUR Garden with Craig Lehoullier. Broadcast Date 9/1/2021
  • Home Fruit Production with Dr. Larry Stein. Broadcast Date 9/15/2021

Additional Resources

Buy From Drought to Deluge: The Resilient Central Texas Garden directly from Travis County Master Gardeners

Watch the interview about From Drought to Deluge: The Resilient Central Texas Garden on Central Texas Gardener

Sign up for Travis County Horticulture Event Notifications

Monthly Gardening Calendar for the Austin Area

Basic Landscape Design

Soils and Composting for Austin

Lawns in the Home Landscape

How to Water Efficiently in Central Texas

Ornamental Plants

Plant Problems and Maintenance

Edible Gardens for Austin

Persons with disabilities who plan to attend a meeting and who may need auxiliary aids or services are required to contact Sheryl Williams, Texas A&M AgriLife Extension Service-Travis County at 512-854-9616 or sheryl.williams@ag.tamu.edu ten working days prior to the meeting so appropriate arrangements can be made.


Soil Solarization Eliminates Weeds and Pests

AgriLife Logo

Your August Gardening Project

Most people in the Austin area try to forget about the heat of summer, but there is one gardening project that is perfect for August. Research by horticulturists of the Texas A&M AgriLife Extension Service has found that soil solarization can suppress weeds both short and long term and is best done during the hottest days of the year.

A Drastic Solution?

Soil sterilization may sound like a drastic solution, but it’s actually an environmentally friendly way of using the sun to control soilborne weeds and pests. Using a transparent polyethylene cover to trap solar energy, the resulting temperatures and steam will kill bacteria, fungi, insects, nematodes, mites, weeds and weed seeds. Travis County Master Gardener Ann Roe solarized her front yard and shares why she chose this method, how she did it, whether she supplemented with herbicide, and the results that she’s achieved.

Choose the Right Site

There are two processes happening in soil solarization – heat and steam. Excess heat will kill most plants, even if they have bulbs or roots. However to kill nematodes, weed seeds, and insect eggs in the soil, you’ll also need hot steam.

Soil solarization works best on deeper, heavy clay soils, like those found on the east side of Austin. That’s because clay can hold more water than other soil types. Soil moisture is necessary to produce steam every day, which is a critical component to the sterilization process.

Solarization may be less effective on sandy or shallow soils like those found on the west side of Austin. These soils don’t retain water well, and therefore, will produce less steam. To maximize the benefit of solarization in sandy soils, lay drip irrigation lines under the clear plastic cover and add water regularly.

When Ann started her project, her goals were to add value to a rental property and help the environment. “I wanted to reduce mowing, add drought tolerant plants and provide native plants for pollinators.” To do this, she wanted to eliminate the yard full of weeds and start from scratch.

“The site gets a lot of sun. The 50% of the yard closest to the house gets more shade from the western sun but otherwise the yard faces East and gets sun all day.”

Choose the site carefully so that desirable trees and shrubs can be avoided. Planning ahead allows you to relocate plants you want to keep before summer arrives.

Six Steps to Soil Solarization

There are six recommended steps to solarize your soil.

Step One – Clear the area of plants and debris.

the first step was to mow the lawn as short as possible.

Ann first mowed the area as short as possible.

The first step is to clear plants and large debris like branches and all plants in the area you want to solarize. You can chop them off at ground level if you don’t want to disturb the soil.

Ann shares that “We mowed and raked and removed as much plant material as possible.” Raking also helps to remove large dirt clods or rocks. It’s important to have a smooth soil surface to prevent air pockets under the plastic covering.

Step Two – Water the soil deeply until it is wet.

July, August, and September are hot and dry in the Austin area and may have already baked out most moisture near the surface. Take time to water deeply until the soil is moist to a depth of six inches (just as if you were getting ready to plant in it.) Depending on how dry it’s been, it make take more than one irrigation session to accomplish this. Remember that steam is going to kill seeds, nematodes, and many pathogens, so it’s worth your time to ensure that the site has adequate soil moisture in reserve for the project. Use a trowel or shovel to check how deeply the water has penetrated.

If you have shallow or sandy soils, install drip irrigation so that you can add moisture when needed. Normally, water beads will appear on the underside of the plastic early each morning and disappear by noon after the water has turned to steam. When it looks like fewer beads are forming or don’t appear at all, turn on the irrigation and replenish soil moisture.

Step Three – Cover the area with clear plastic (such as 1 to 4 mil painter’s plastic).

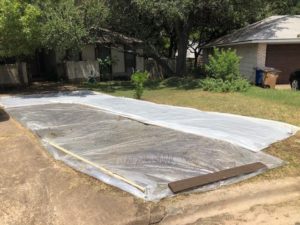
Solarization area covered with plastic and held in place with boards.

Solarization area covered with plastic and held in place with boards.

Use clear, not white or black plastic; they don’t allow enough heat to get to the soil. Ann purchased her plastic from Amazon and Home Depot.

Step Four – Bury the plastic edges in the soil to trap the heat and steam.

Experts recommend that you bury the plastic edges so that you can trap the maximum amount of heat and steam. If you live on the west side and don’t have much soil, this may be a challenge.

Ann’s project was next to a driveway and sidewalk that made it difficult to dig, so she opted not to bury the edges. She used boards and tent stakes to keep the plastic in place. You can use other heavy objects like bricks or large rocks to keep the plastic from flying around.

Step Five – Leave the plastic in place for at least 4 weeks spanning the hottest part of the summer.

Austin area weather can be tricky mid-August through October due to the influence of hurricanes entering the Gulf of Mexico. You need to leave the plastic in place for at least four weeks of full sun. Adjust as needed depending on how many cloudy days may occur. Ann ended up keeping her plastic in place for a full six weeks.

Be careful not to walk on the plastic so that it doesn’t tear or move. You may have to install temporary fencing to keep pets off of it. Repair any damage and reseal seams as soon as you notice them.

Step Six – Remove the plastic and plant immediately.

After removing the plastic Ann discovered weeds at the seams.

After removing the plastic Ann discovered weeds at the edges and seams.

Unfortunately for Ann, part of the plastic seam opened and allowed weeds to grow. “I really wanted to avoid weed killer but it just wasn’t possible.” She has since found that she’s had to spot treat along the driveway and sidewalk.

Both Texas A&M and University of California recommend planting as soon as soil temperatures return to normal in a few hours after removing the plastic. Texas A&M recommends adding compost on top to restore soil microbes. Don’t till your soil because you don’t want to bring contaminated soil from below the solarization zone.

Ann added mulch when she added new plants, but says “I did not add compost. I was concerned about encouraging weed growth more than the new plantings. Time will tell if that is the right action.”

Ann landscaped her newly solarized area with Agave, Red Yucca, (Hesperaloe parviflora), Purple Fountain Grass (Pennisetum setaceum), Gulf Muhly (Muhlenbergia capillaris), Spineless Prickly Pear (Opuntia ellisiana), and Spanish Lavender (Lavandula stoechas.) Ann’s budget was $1,000 or less for the entire project. She added four yards of rock for $550. The plants and other materials cost approximately $150.

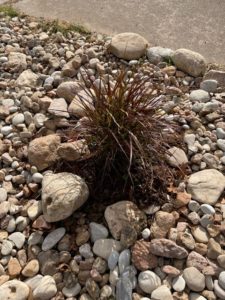
Purple Fountain Grass, Pennisetum setaceum

Purple Fountain Grass, (Pennisetum setaceum)

Worth the Time Spent

Ann says that it was worth the time spent. “I like how it looks. This was a test. I will do the rest of the yard next year.” The one thing she will do differently next time is purchase larger plastic sheets and leave them on for all of August and September.

Additional Resources

Soil Solarization; Masabni, Joseph G. and Franco, Jose G. Texas A&M Horticulture Department

Soil Solarization; Fennimore, Steve.  Department of Plant Sciences, University of California

Soils and Composting for Austin

Low Maintenance Landscaping Tips

About Ann

Travis County Master Gardener Ann Roe

Ann became a Travis County Master Gardener in 2015 after a 26 year career in Austin’s high tech industry.  Her focus is native trees and ornamentals for central Texas.  She believes the best part of the master gardener organization is the ongoing educational opportunities and finding like-minded Austinites to talk with about all things related to plants.