Winter is Compost Prep Time

Thin leaves, such as those from Red Oaks and Bradford Pears, decompose quickly.
You might consider winter a gloomy season with the trees shedding their leaves and perennials wilting with the cooler temperatures. But for gardeners, it’s compost treasure hunt time! This is the optimum time to begin gathering the ‘brown’ material needed for composting throughout the next year. My relatives (and husband) think I’m crazy about this time of year, as I scoop up as many leaves as possible, ask family to bag up their excess leaves, and volunteer to clear-off and bag-up my Mom’s driveway in Houston. Her yard is a treasure trove of several pine trees and white oaks whose leaves and needles make wonderful compost.
Storing Browns for Compost
My favorite leaves to store for compost are the larger thin leaves, such as the Red and White Oak leaves, as they decompose very quickly. While pine needles take a little more time to decompose, I love the acidity it adds to my compost since I live on the Edwards Plateau and have alkaline soil. The pine needles are a freebie to aid in neutralizing the PH in a few areas where I want to grow roses. Although Live Oak trees are more plentiful around Austin, their leaves are thicker and tend to take longer to decompose. But if that is what you have, then definitely use them.

Pine needles take longer to decompose but can help add soil acidity.
I recently invested in a shredder which can reduce leaves and twigs to 1/16 their original size. Therefore, I can take several large bags of leaves and still have one large bag left over to store. Shredding the leaves greatly reduces the decomposition time and helps to better manage the moisture level of the compost. But shredding is not necessary, especially if using the thinner leaves of the Red Oak. The next big event for collecting ‘browns’ for the compost is in February and March when we cut back the dead and wilted perennials.
Recycle for Greens
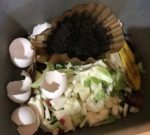
Common vegetable table scraps become ‘greens’ for composting.
A great recycling practice is to use your table scraps for compost which ultimately benefits your yard. A ‘green’ in compost is any non-fat, non-meat or dairy item. I use any vegetable or fruit scrap, used coffee grinds (including the filter), and eggshells. Rinsing out the egg white skin helps to alleviate any creatures from invading the compost bin. At my house, we have a pail for the weekly addition to the compost bin. A good rule of thumb is to cut up items to a size no longer than your finger since smaller pieces decompose faster. Crush items like eggshells to aid their decomposition.
My husband and I often battle over who gets the watermelon or cantaloupe rinds as he likes to feed them to the roaming deer, and I love them for the compost. Our agreement is that whatever the deer do not eat in the first day goes into the compost. And the recycling is therapeutic, as I now worry less about over-buying vegetables or greens, as anything wilted still has value for the compost. Interesting enough, I find that I often have more green components for the compost than brown, thus my new focus on bagging browns for future use.
Compost Bin Selection

Tumbling Composter with two area, one to add materials and one to allow to ‘cook’
I began composting just 2 years ago and continue to learn with every batch. Being a beginner and living in an area with lots of wildlife, I chose the tumbling-type of composter to avoid potential invasions by the night critters. The downfall of this type is the small amount of compost in each batch, but definitely a good size for a small household. My initial attempts took longer to process, as I realized I had plenty of table scraps (greens) and not enough brown (dead) material. A good rule of thumb is 3 times the number of browns to greens, but you’ll know you’ve got the right mix if there is no odor and the decomposition is progressing every time you check. If you do smell decaying food or other odor, you need to add more browns.
Compost Troubleshooting
If the pile is not decomposing or doesn’t appear to be hot, you may need more greens or moisture. It’s good to turn (and check) your compost once a week. Turning the compost incorporates air into the process and allows you to check on the moisture content. If the compost feels like a wet (not soggy) sponge, then the moisture level is good. If it looks dry, then it’s time to add water. I normally wash out the greens bucket and use that water to add to the compost. After all, the insects and worms doing the hard work of decomposition need to drink too!
How to Use the Compost

Compost is ‘ready’ when dark brown, has an earthy smell, and original material is no longer recognizable.
One batch of compost in the tumbler makes 2 to 3-gallon pails of compost. This amount allows the spreading of a smaller raised bed, or garden area. I cycle from one bed to another or use the compost to enrich the soil in an area I’m planning to cultivate in the future. In the summer when the temperatures are warm, a compost batch can ‘cook’ in as little as six weeks. In the middle of winter, it takes closer to 3 months since my tumbler is small and it’s harder to keep the batch hot (a minimum of 130F for 3 consecutive days is required to reduce pathogens and seed pods). When I see that all the original components are no longer identifiable, and there’s an earthy smell to the compost, I know the batch is ready.
Topic of Conversation
The fact that you’ve chosen to compost will be a topic of discussion with the family and in future gatherings. It’s a great activity for the family to participate in and become increasingly aware of the amount of food and yard waste that can add value to your garden. Conversations at our home start when guests ask why we’re keeping vegetable peelings and wilted lettuce leaves. Just this New Year’s, my sister-in-law asked if I wanted to take home all the outer cabbage leaves she wasn’t planning to use. I think you can guess what my answer was. I accepted with a huge smile and said ‘SCORE!’
Additional Resources
Soils and Composting for Austin
Calculate How Much Compost or Mulch You Need

Yvonne was a 35+year veteran in the computer and information technology industry when she retired and moved from Houston to the Austin area. In 2018, Yvonne certified as a Travis County Texas Master Gardener to follow her passion for gardening and volunteering within the community. She has spent 20+ years enjoying gardening and working with bulbs and perennials. She now tackles the challenges presented by the Austin area wildlife, drought, and limestone soil.
