The September Vegetable Garden Checklist by Paula Wolfel

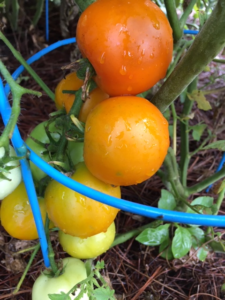
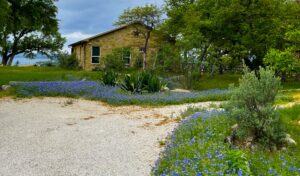
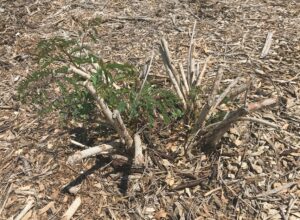
Late September vegetable garden with remnants of summer garden and fall transplants.
Last month’s heat most likely affected your vegetable garden. Although daytime temperatures usually remain hot throughout September, we should start to get a break with lower nighttime temperatures. The drop in temperatures will help relieve heat stress on plants and some of your vegetable plants may recover, but it depends on the extent of damage the heat caused to your plants, water availability, and fall temperatures. If your summer garden did not survive or if you are ready to be done with your summer garden, then September is the time to start planting your fall and winter vegetables. When making planting decisions, pay attention to whether the plant is frost tolerant or frost susceptible and how many days to harvest is on the seed packet or plant label. Keep in mind varieties that grow well in Texas. For a comprehensive list, check out this resource.
PLANTING
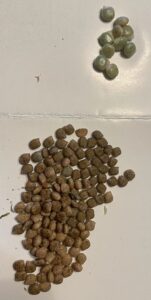
Seeds
- Beans, snap and lima (early month)
- Beets (all month)
- Carrots (all month)
- Cucumber (first week)
- Garlic (mid-late month)
- Greens, cool season (late month)
- Leeks (all month)
- Onion, bunching/multiplying (all month)
- Peas, English, snap and snow (all month)
- Potatoes, Irish (first week)
- Radish (all month)
- Shallots (late) month
- Squash, summer (early month)
- Turnip (all month)
Seeds or Transplants
- Asian Greens (all month)
- Chard, Swiss (all month)
- Collards (all month)
- Kale (all month)
- Kholrabi (all month)
- Lettuce (mid-late month)
- Mustard (all month)
- Spinach (mid-late month)
Transplants
- Artichoke (all month)
- Broccoli (all month)
- Brussels sprouts (all month)
- Cabbage (all month)
- Cauliflower (all month)
WATER
- Water remains key while the high heat remains. Drip and low-flow irrigation are recommended because they reduce evaporative water loss, bring water directly to the plant, and help prevent water overspray on the plant leaves.
- Continue watering established plants preferably in the early morning when plants are absorbing water for photosynthesis. Avoid watering in the middle day because water will evaporate in the heat.
- Daily watering is important for new transplants for approximately the first two weeks while they establish roots. Monitor soil moisture to prevent overwatering.
- When planting seeds, keep the soil moist until the seeds have germinated and have developed true leaves.
- Most vegetables have growth stage when water is most critical: during head development for broccoli and cauliflower, during flowering and pod enlargement for beans and peas, and during root enlargement for radishes, beets, and carrots. Leafy vegetables do best with a consistent supply of water from planting to harvesting.
FERTILIZE
- Wait until cooler temperatures arrive before fertilizing. Ideally, daytime temperature should be in the 80’s and nighttime temperature below 76°F.
SOIL
- Add a fresh layer of mulch with your fall garden; mulch helps to conserve moisture in the soil. Placing 2-3 inches of hardwood mulch, pine straw, leaves, hay, homemade mulch mixes or bagged products around plants and over drip lines helps provide a layer to protect and preserve soil moisture.
DISEASES/PEST
- Make sure to monitor the plants for disease and pest infestations because heat and drought-stressed plants may be more susceptible to infections and marauding insects.
- Aphids, white flies, and mealybugs continue to be a nuisance this month; they suck plant sap from leaves and stems. The best defense are natural predators such as lady bugs, lacewings, and praying mantis; they should arrive naturally. You can also treat with blasts of water. Sooty mold fungi can grow on the excess honeydew secretions left from these insects. If this occurs, remove the leaves from the plant.
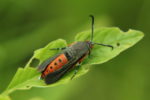
- Conchuela stink bugs (Chlorochroa Ligata), Leaf-footed Bugs (Leptoglossus Phyllopus), Harlequin Bugs (Murgantia Histrionica), and Squash Bugs (Anasa Tristis) also continue to be a nuisance in the garden. All these bugs have piercing mouthparts that suck juices from plant leaves, stems, and fruits. They can be picked up and squashed, or thrown into a cup of soapy water. Check the bottom of leaves for eggs. They reproduce quickly so if left unchecked you will have dozens within days.
- Check labels for any chemical treatments for plant disease and insect treatments before applying.
MAINTENANCE

Green Peppers with sunscald.
- Keep up with the weeds! Weeds compete with plants for water and nutrients. Many weeds are adapted to the extreme heat.
- Trim any leaves that have yellowed, or have succumbed to disease or pests.
- Remove plants that are infested with pest damage or disease.
- Check the underside of leaves for pest eggs.
- Careful when pruning and staking plants. Removing foliage that is covering fruits can expose them to intense sunlight and lead to sunscald.
HARVEST
- Melons, eggplants, peppers and okra most often deal with the heat better than other vegetables
- Vegetables with sunscald are okay to eat, simply trim off the part that is sunburned.
Additional Resources
Weather Strategies for Austin Gardens
Watch the Vegetable Gardening in Central Texas Webinar
Vegetable Planting Calendar (Español, 繁体中文)
Recommended Vegetable Varieties for Travis County
Easy Gardening Series Detailed tips from Texas A&M University AgriLife Extension on specific crops and practices.
Vegetable Gardening in Austin Resource hub for all things vegetables for Travis County
Plant Rotations, Successions and Intercropping
Monthly Gardening Calendar for Austin and Central Texas
Sustainable Food Center Farmers Markets
About Paula Wolfel
 Paula Wolfel joined the Travis County Master Gardener program in 2022 and has taken extra training to become a vegetable specialist. She grew up in the suburbs of Chicago learning how to garden from both her father—a Sicilian vegetable and fruit tree gardener—and both her grandmothers, and then spent years in Virginia gardening. Paula loves gardening because she finds it to be a grounding force- it gets her out of her head and into the present. She loves the pride that comes with cooking a meal for her family with every ingredient coming from her garden… and then the humility she feels when she loses an entire crop because of Mother Nature. She finds gardening to be wisdom, lessons, best practices passed down generation to generation, season to season and hopes to share that with you.


 Adults use flash patterns to identify those of the same species as well as determine location of the opposite sex. Female fireflies choose their mates based upon flash pattern characters; males with higher flash rates and increased flash intensity are preferred.


 Sheryl Williams has been a Travis County Master Gardener since 2010 and currently works as the Horticulture Program Assistant at Texas A&M AgriLife Extension – Travis County. She was introduced to gardening by her mom and grandma and has been an avid vegetable gardener most of her life. Sheryl believes that there is nothing more satisfying than growing and preparing your own food. She likes gardening in Austin year round and concedes that means pulling weeds every day. She practices organic gardening principles and enjoys the challenge of outsmarting garden pests. Occasionally she loses these battles, but doesn’t mind sharing a good meal.

 Saltmarsh caterpillars are extremely variable in color and have many setae in the late instar which creates a hairy or fuzzy appearance. They have striped or mottled bodies varying from black to brown to yellow and reaching lengths of 2.25 inches. Hairs, or setae, also vary in color and are mostly soft when touched. Hairs are not venomous and do not sting, but some people may be sensitive to the hairs.
 Saltmarsh caterpillars actively disperse, and late instar larvae can be seen moving quickly across lawns, landscape beds, sidewalks, roads, and other locations. These caterpillars can move easily into areas and begin to feed on plants. Their chewing mouthparts cause damage to plants by defoliation. They have a wide host range feeding on numerous broadleaf plants including trees, shrubs, crops, and others.
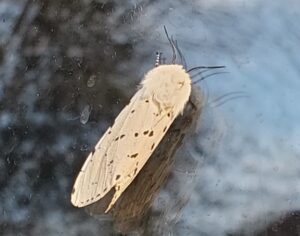

 What is a Texas Superstar plant?