In the January 2021 Vegetable Garden by Patty Leander

AgriLife Logo

Keep Gardening!

Pump up your diet by cultivating and consuming a variety of vegetables

Pump up your diet by cultivating and consuming a variety of vegetables

Happy New Year! Interest in growing and eating vegetables blossomed during the COVID shutdown last year. I’m hoping that everyone who started a vegetable garden during the pandemic will keep it going. Vegetables are an essential part of a healthy diet for everyone, no matter who you are or how old you are. There are many benefits for everyone to gain from a plant strong diet. Eating vegetables safeguards our health, the process of growing them contributes to our movement and physical activity, and cultivating a garden in the outdoors does wonders for our mental health. A winning trifecta!

Learn to Upcycle

Your vegetable garden carrots are completely edible - both top and bottom of the carrot plant can be used.

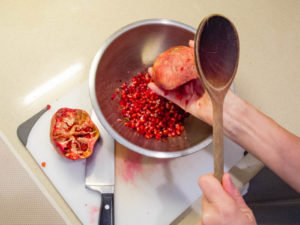
Don’t compost those carrot tops – eat them! Try chopping the ferny foliage and incorporating into soups or stir-fry dishes.

A few years ago, I noticed a trend in the food world that has resurfaced in a concept known as upcycling. The idea is to minimize food waste and improve vegetable intake by utilizing parts of the plant we might generally discard – instead of composting those carrot tops, trim them and add them to soup, sauté them with other vegetables or blend them into a pesto; simmer corn cobs to make a stock for chowder; julienne the tender stalks of broccoli to use in salad or stir fry; make stock from stems, peels and skins of herbs and vegetables. This will be my resolution for 2021 – please join me in making the most of the produce that comes from your garden, the CSA, the farmer’s market or the grocery store. Let’s make every vegetable count!

January Checklist

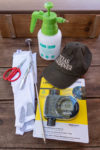
Here is the vegetable gardener’s checklist for January:

Fertilize

  • Continue to fertilize garlic and other vegetable plants every 2-3 weeks with a liquid plant food or fish emulsion.

Water

  • Water the garden in the absence of rain. If you connect hoses or turn on sprinklers be sure to turn them off and protect in the event of a hard freeze.

Transplant

Onion seedling ready to plant

Plant short-day onions this month; they will begin to bulb in response to the lengthening days of spring.

  • Set onion transplants into the garden in mid-January. Success with onions depends on choosing the right varieties for where you live. In Central Texas we want to plant short-day or intermediate-day varieties that begin to bulb in response to the lengthening days of spring but complete their growth before the heat of summer arrives. See our list of recommended varieties here. Big box stores often mistakenly carry varieties that only do well in the north.
  • Plant onion seedlings 1 inch deep and 2 inches apart. After a few weeks of growth thin seedlings 4-6 inches apart and eat the thinnings as green onions. For optimum growth and development sidedress plants every 3 weeks with ½ cup of a nitrogen-rich fertilizer per 10 feet of row.
  • Plant lettuce and spinach transplants. Watch for freezing weather and cover newly planted seedlings to protect them from freeze damage.

Seeds to Plant

Collards and Kale thrive in the winter garden.

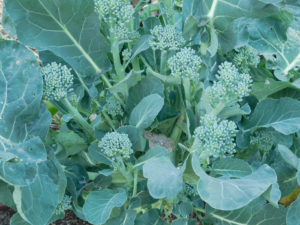
Collards and kale thrive in a sunny winter garden.

  • Plant snow peas and sugar snap pea seeds the latter half of January. Give them a head start by planting seeds indoors in individual peat pots. After 2 or 3 weeks the entire pot can be planted outside. Peas plants are quite hardy.
  • If it’s too cold outside get your hands dirty inside. Fill small containers with moist potting soil and plant seeds of cole crops. Cover tray with plastic wrap and place in a warm location for a few days. As soon as seeds emerge remove plastic and place directly under grow lights. Seedlings should be ready for transplanting in 5-6 weeks. Be sure to label each pot with the date and variety and check the seed packet for detailed planting information.

    Start vegetable garden seeds indoors

    Growing transplants indoors allows you to garden even on the coldest days of the month.

  • Plant asparagus crowns this month. Choose a sunny area where plants can grow undisturbed for several years.
  • Decide when you want to plant tomatoes and count back 7 or 8 weeks. This is when you should plant tomato seeds if you want to grow your own transplants. I usually start my seeds the first week of January, bump them up to a slightly larger container after they produce their first set of true leaves and plant them in the garden in early to mid-March, with protection from wind and cold.

Soil

  • Take advantage of mild winter days to prepare for spring. Spread compost over planting areas and mix it in as you gently loosen the soil with a spade or fork. There is no need to till or aggressively work the soil; doing so disrupts the soil structure, earthworms and microbes. Cover soil with mulch and let the microbes do the work.

Diseases/Pests

  • Inspect regularly for pests. Aphids, beetles, and caterpillars may stay active throughout the month, especially on cole crops.

Maintenance

  • Cultivate good gardener habits: pay attention to the growth of your plants, and plan for a timely harvest when the quality of the vegetables is at the peak of flavor and nutrition.


Additional Resources

Recommended Vegetable Varieties for Travis County

Vegetable Seed Sources

Vegetable Gardening in Austin

Sustainable Food Center Farmers Markets

Texas Farmers Markets

Monthly Gardening Calendar for Austin and Central Texas

In the Vegetable Garden with Patty G. Leander


Patty G. Leander is a contributing editor for Texas Gardener magazine and an active member of the Travis County Master Gardener Association with an Advanced Master Gardener specialty in vegetables. She has been growing vegetables year-round in her Austin garden for over 20 years, encouraging the use of sound, horticultural principles that will lead to a bountiful harvest.

One and Done Bulbs by Yvonne Schneider

AgriLife Logo

Floral Treasures for Spring

Red Crown Imperial flowers are an example of one and done bulbs for Austin

Crown Imperial blooms can reach nearly 4 feet in height.

Looking for a pop of color or a unique bloom to boost your spring show? Bulbs may just be your answer! In the Austin area we have many bulb varieties that naturalize and bloom each year. However, our warmer winters are not kind to those bulbs requiring ‘chill hours’. ‘Chill hours’ are the minimum amount of time bulbs must stay below temperatures of 40F.

But if you don’t mind a ‘one and done’ annual show, then your options are endless. Most bulbs, such as tulips (Tulipa gesneriana), come from Holland and arrive  pre-chilled and ready to plant. Follow the planting instructions and wait for the spring blooms. After the floral show you can either lift and throw away or just leave in the ground to die. Essentially, you are treating these bulbs like annual flowers.

Unique Crown Imperials

Crown Imperial has a unique pineapple-looking bloom. This one is a yellow variety.

Unique pineapple-looking bloom.

I’m always on the hunt for unique spring bloom that wildlife won’t disturb and can tolerate some shade. I’ve found Crown Imperials (Fritillaria imperialis) to fit the bill. Red crown Imperial (Fritillaria rubra) and yellow crown imperial (Fritillaria lutea) are deer resistant and bloom in mid-spring with highly unique downward facing flowers. The flowering stalks can reach 36-40” in height and are great for cutting and bringing inside. The flowers are fragrant and can be the highlight in a floral arrangement. The musky and herbal smell of the foliage makes them wildlife resistant.

Plant at an Angle

Large fleshy bulb of the Crown Imperial

The fleshy bulbs have a center stem hole.

Crown Imperials are recommended for planting zones 5-8. The location I chose has morning sun and afternoon shade since our Austin-area springs can warm up quickly. To plant, grab a pair of gloves, a hand spade, a measuring tape, and a watering can. Handle these fleshy bulbs with gloves to avoid a lingering odor on your hands. These are larger bulbs, about 3-inches in diameter, requiring a planting depth of 6-8 inches to support their tall flower stalks.

An 8 inch hole dug for the bulb

Plant 6-8 inches deep to support tall stems

Recognizing many might have limestone rock beneath the soil, be sure your location has sufficient depth by measuring your hole. Once you have the desired depth, plant the bulb at a 45-degree angle to avoid water from being caught in the center (or stem hole) of the bulb and possibly causing bulb rot. Replace the soil and water well to activate the bulb to begin its growth cycle. Add a little mulch to help preserve the moisture over the fall/winter months.

Impressive Show

Purple blooms of Snake’s Head Fritillary are another example of one and done bulbs for Austin

Purple blooms of Snake’s Head Fritillary are show-stoppers.

These impressive plants are accompanied by whorls of lance-shaped foliage around the lower ½ of the stem and the added foliage above the flower gives a pineapple effect. The bulbs can spread 1-1.5 feet across, so you don’t need too many of these to enjoy a unique display next spring. Or, if you prefer a smaller version, try the Snake’s Head Fritillary (Fritillaria meleagris) which only grow up to 12 inches in height. Plant these in large groupings for the full effect of their purple spotted blooms. Although these bulbs also have an odor to deter wildlife, the smaller bulb does not have the potent smell of its larger cousin. In fact, I had to replant two of the twelve bulbs I originally planted due to curious squirrels. Since their first encounter, however, they have left them alone. Now I just wait until spring to enjoy the unique blooms.

Tulip Show Extraordinaire

If tulips are your passion, go right ahead and order a few and enjoy the one-time show in your garden. Need ideas? The largest tulip show in the Netherlands is the Keukenhof gardens outside of Amsterdam. Every March through May the gardens highlight over 7 million bulbs in various displays cultivated by local artists and growers. I had the pleasure to see the gardens a few years ago on a leisure trip, and even my husband said it was one of the best excursions we’ve ever taken – and he’s not a ‘flower person’ but tolerates my passion.

Rows of blooming flower bulbs at Keukenhoff Gardens.

Keukenhoff bulb display.

Storing Bulbs

If you prefer to re-use your bulbs that require chilling hours, allow the foliage to wilt and die. The dying foliage provides nutrients to the bulb for next year’s blooms. Once the foliage is brown, the bulb is ready to be lifted. Remove all soil from the bulb and spread in a shady dry place, such as a garage, to allow the bulb to completely dry. This may take a week. Then store the bulbs in a cool dry place (60-65F) with good air circulation, such as a cardboard box with holes, or hanging in a nylon hose. If storing in a box or container, you can layer the bulbs, however, do not create more than 3 layers to allow for proper air circulation.

Prepping for Next Year

The bulbs that require a dormancy period must be tricked into thinking they’ve experienced the dormant period by placing them in a refrigerator for 4-6 weeks. Check the requirements for the individual bulb type for exact timing. One word of caution – avoid storing fruit in the refrigerator along with the bulbs, as ripening fruit releases ethylene gas which inhibits bulb flowering. With a little TLC, your bulbs will be ready for planting and willing and able to produce the bloom show all over again each spring. Just remember to trick dormancy in enough time prior to the planting season.

Additional Resources

Bulbs for Central Texas

December Gardening Checklist

Yvonne Schneider, guest blogger

Yvonne was a 35+year veteran in the computer and information technology industry when she retired and moved from Houston to the Austin area. In 2018, Yvonne certified as a Travis County Texas Master Gardener to follow her passion for gardening and volunteering within the community. She has spent 20+ years enjoying gardening and working with bulbs and perennials. She now tackles the challenges presented by the Austin area wildlife, drought, and limestone soil.

The Gift of Amaryllis Bulbs by Yvonne Schneider

AgriLife Logo
Hardy Red Amaryllis bloom

The beautiful Amaryllis ‘Hardy Red’

Amaryllis Bulbs Popular Holiday Gift

Amaryllis bulbs are a popular gift during the holiday season that you can find at local grocers, big box stores, nurseries, and even online. The Hardy Red Amaryllis (Hippeastrum x johnsonii) is a great variety for Central Texas, but you can find different shapes and colors (white, red, pink, salmon, and yellow hybrids) that grow well in our area.

The great thing about Amaryllis is the large bloom, anywhere from 5-10 inches in diameter, depending upon the variety. The foliage grows up to 18” in height, with the flower stalk 6-8” above that. If planted in a high wind area, the flower stalks may require staking to avoid falling over. When planted outdoors, Amaryllis bloom in spring, normally around Easter. The strappy green foliage is semi-evergreen or evergreen. Here in Austin, plant Amaryllis in a sunny location with a little afternoon shade. This year, I bought the Amaryllis Elvas (Hippeastrum ‘Elvas’) and Ruby Star (Hippeastrum ‘Ruby Star’) to enjoy indoors during the holidays, with plans to relocate outdoors for future admiration and naturalization.

Bulbs are Large

Amaryllis are Large Bulbs

The larger the bulb, the older it is.

When looking for Amaryllis bulbs, size definitely matters – the larger the bulb, the older the bulb, and the greater number of stems and blooms you’ll receive. Each stem will produce multiple blooms, and the show can last from weeks to a month. Expect to pay a little more for the larger bulb, but a few dollars more is well spent to ensure your holiday bloom. Inspect the bulb upon receipt to ensure it’s firm, as a mushy bulb indicates it is beginning to rot and die. You may also see the foliage beginning to appear, which is also a sign of health. It’s best to plant soon after purchase, but you can store in a cool dry location if required. Just remember to keep the bulb dry to avoid rotting.

Plant for Indoor Enjoyment

Plant the bulb with the pointed end up.

Plant with pointed side up.

To plant in a container, grab a pair of gloves, potting soil, and a container deep enough to allow 2-4 inches of soil beneath the bulb and approximately one inch from the sides of the container. If planting multiple bulbs in one container, allow for an inch between each bulb. Fill the container with potting soil and set the bulb, pointy side up, on top of the soil. Place the bulb so that the top inch, or neck, is above the soil line. Fill in with soil and water just enough that the soil feels like a wet sponge (not dripping wet). Place the container in a sunny location, ideally close to a window.

Only water the bulb once you see the foliage begin to emerge. Then keep the soil moist, but not wet. In 40-60 days, you’ll have beautiful blooms to share with company or just admire yourself. Amaryllis bloom in temperatures ranging 65-75F, therefore the warmth of an indoor room (or greenhouse) is required to force the blooms earlier than springtime.

Once the blooms have expired, allow the foliage to wilt and die before removing, as that feeds the bulb for next year’s blooms. At this point, you need to decide whether to store the bulb for next year’s container blooms, or plant outdoors. If storing, wipe all the soil off the bulb and allow to dry in a cool dark area, like a garage. Once dry, store in peat moss or a nylon stocking to allow for air circulation and a dry home.

Plant for Outdoor Enjoyment

In the Austin area, we have the benefit of warmer winters allowing for Amaryllis bulbs (rated USDA zones 8b-10) to naturalize in our gardens. Amaryllis bloom best with a minimum of 4-6 hours of sun, with morning sun preferred (don’t we all enjoy a little afternoon shade?). As with the container planting, plant the bulb with the pointy side up allowing for the top inch, or neck, to remain exposed above the soil line. Amaryllis can tolerate any type of soil but must have at least 2 inches beneath the bulb to accommodate the roots. If planting multiple bulbs, allow for 3-4 inches between the bulbs to allow for eventual offsets and so as not to crowd the roots. Amaryllis are great bulbs to place in between perennials or ground covers, and shine when located near a succulent.

Not a “One and Done”

Often amaryllis bulbs are bought to enjoy during the holidays and then discarded once the blooms are over. These bulbs are easy to naturalize or store for ongoing enjoyment, with just a little care. I hope to continue trying new varieties enjoy a half dozen or more in my garden for that spring ‘pop’ of color. Amaryllis are hearty and willing to perform – try them today! Or wait until after the holidays and buy for half the price and find a spot in your garden. You’ll be glad you did come spring.

Additional Resources

Bulbs for Central Texas

December Gardening Checklist

Yvonne Schneider, guest blogger

Yvonne was a 35+year veteran in the computer and information technology industry when she retired and moved from Houston to the Austin area. In 2018, Yvonne certified as a Travis County Texas Master Gardener to follow her passion for gardening and volunteering within the community. She has spent 20+ years enjoying gardening and working with bulbs and perennials. She now tackles the challenges presented by the Austin area wildlife, drought, and limestone soil.

Our Dive into Rainwater Collection by Martha King

AgriLife Logo

Rainwater collection instead of a pool?

Newly installed rainwater collection system

The newly installed 5,ooo gallon tank.

When I retired, my partner Beverly and I considered building a swimming pool. But the more we thought about a pool, the more trouble and expensive it sounded. It also didn’t seem environmentally responsible in a world that is becoming increasingly more focused on water conservation. Instead we dove headfirst into installing a rainwater collection system.

Get the biggest tank that you can afford

I consulted with experts about the scope of such a project. The collective advice was to invest in as big a rainwater collection tank as we could afford. Since we live in a central, urban neighborhood, we thought it best to go wide rather than tall. Our home has two lots. The landscape design features understories, ponds, birdbaths, and seating areas under a canopy of decades old oaks and elms. It’s basically a small urban wildlife paradise, and a perfect place to camouflage a rainwater tank!

Research applicable regulations

Our initial motivation for collecting rainwater was to utilize it for irrigating our vegetable garden. We somewhat naively thought that we could connect such a tank to our existing drip irrigation system. Conceptually it could work with the proper mechanisms in place. However, we quickly realized that there were a number of actualities that made our plan unrealistic.

First off, there is the City of Austin and its regulations. We learned of the city regulation that prohibits pumping water from one lot to another. Our project required a number of city officials to grant a variance for the water-pumping regulation. One of the holdouts required the influence of our city council representative to get his ultimate approval.

With that final flaming hoop extinguished, we then realized that the average monthly rainfall in Austin was not conducive to using rainwater in our drip irrigation system. As most of you know, rainfall in Austin is feast or famine, so the tank would sometimes be overflowing and sometimes be too low for regular watering, especially during peak growing seasons. All that said, we still recognized the value of collecting rainwater for manually irrigating our gardens and yard.

Rainwater conveyance takes planning

After researching all of the options, we decided on a fiberglass tank, primarily because of the minimal maintenance required and the longevity of the tank and fittings. We picked a 5,000-gallon tank, which is about 15.5 feet wide and 7 feet tall, that fit our budget and scale.

Holding the water, of course, is only one piece of the puzzle. You have to find a way to get the water into and then back out of the tank. We planned to collect rainwater runoff from our house, but our tank would not be close to it.  Therefore, we had to find a way to get the water from the roof back to the tank. For that we hired a designer to help map out a system of underground pipes that would go from two corners of the back of the house and carport, eventually meeting before carrying the water up into the tank.

Trenches were dug to lay pvc pipe from the gutters to the rainwater tank.

Trenches were dug to lay PVC pipe from the gutters to the rainwater tank.

We installed gutters on the four metal roof surfaces to direct the water, for a combined total of 1,370 square feet.  Using rainwater collection calculators, we knew it would take about 6 inches of rain to fill the 5,000-gallon tank. For those times of deluge (e.g., Memorial Day weekends), there is an overflow at the back of the tank that flows into a PVC pipe with holes in it running along the back of our lot. That overflow helps to irrigate our neighbor’s pecan trees. For the underground pipes, we hired two very conscientious irrigation workers who hand trenched every foot, carefully avoiding almost all of the major roots from the large trees that tower overhead.

We opted for a pump

Now to get the water back out. For that we installed a Grundfos pump and built a small doghouse-sized pumphouse to protect it. This pump provides rainwater on demand to two spigots we added to the yard specifically for rainwater access. Attached are purple hoses (to indicate non-potable water) for hand watering our vegetable gardens, filling our fishponds and birdbaths, and for watering the potted plants on the patio.

A lesson learned

With one painful exception, the tank has never failed to provide adequate supplemental water, even during our longest drought periods. The one hard-earned lesson occurred when I attached a sprinkler to one of the rainwater hoses and unintentionally left it running overnight. Our large trees loved the overindulgence, I am sure, but I have never used a sprinkler since and am careful to turn off the spigots after each use.

City of Austin rebate may be available

One final notable incentive, if you still need one. The City of Austin offers a rebate for the installation of preapproved rainwater collection systems, up to a maximum lifetime total of $5,000.

Additional Resources

Rainwater Harvesting resources from Texas A&M AgriLife Extension

Weather Strategies for Austin Gardeners

Martha King

Martha King joined the Travis County Master Gardeners Association in 2014 after retiring as head of endowments for the University of Texas at Austin, where she enjoyed a 30-year career. She served on the TCMGA board as secretary from 2017-2019 and has worked extensively with the Inside Austin Gardens Tour, including in her own garden as part of the 2015 tour. As a longtime urban gardener in the Crestview neighborhood, she loves nurturing her landscape of native perennials, butterfly and moth attracting vines, and towering shade trees, a favorite corner for neighbors walking by. She is also a regular volunteer at the TCMGA Plant Clinic at the Sunshine Community Gardens Plant Sale, where she loves making new friends and seeing old ones to talk about tomatoes and other plant growing challenges in Central Texas.

Gifts for the Vegetable Gardener by Patty Leander

AgriLife Logo

Vegetable Gardener Gift Ideas

Example gifts for the vegetable gardener like an ergonomic trowel, a serrated garden knife and a hat with a wide brim and protective neck covering

Tackle garden chores with an ergonomic trowel, a serrated garden knife and a hat with a wide brim and protective neck covering

Do you need gifts for the vegetable gardener in your life? Often when I reach for a particular tool or garden aid, I think about how useful it is or what a good gift it would make for a fellow gardener. Below are some of these favorite items that might spark some ideas for holiday gift giving. (Note: These are Patty’s personal selections, not paid endorsements.)

Gardening Books

There are so many books out there about vegetable gardening. I am partial to those written by authors who actually live and garden in Texas. If it doesn’t have okra in the index, I’m not buying it! The Texas Gardener magazine website offers the following books – authored by noted Texas experts – along with a variety of excellent tools. The Texas A&M University Press is another great source.

Two books that don’t feature vegetables but have great local gardening advice are offered by the Travis County Master Gardeners.

Gift Certificates

Most local nurseries and mail order catalogs offer gift cards or e-mail certificates that can be sent directly to the recipient and make excellent gifts for the vegetable gardener. Many of the seed sources we recommend have extensive tool sections.

Favorite Garden Tools

More gifts for the vegetable gardener: a stainless steel widger, compost thermometer, half-gallon pump sprayer, Texas Gardener baseball cap, irrigation timer, sun sleeves and Joyce Chen scissors.

Helpful tools for the hardworking vegetable gardener: a stainless steel widger, compost thermometer, half-gallon pump sprayer, Texas Gardener baseball cap, irrigation timer, sun sleeves and Joyce Chen scissors.

  • A CobraHead Weeder is a multi-tasking tool that can be used for weeding, loosening soil, digging a seed furrow, edging a row and more.
  • Ergonomic tools are always welcome. Check out the Radius website for a variety of garden tools designed to increase comfort and minimize stress on hands and wrists.
  • Small handheld pump sprayers, like the  half-gallon size, are useful for small jobs.
  • Johnny’s Selected Seeds is an excellent source for vegetable seeds as well as many useful tools. Some favorites are a stainless steel widger for potting up seedlings, a compost thermometer, harvest aprons, long-handled weeders, and biodegradable seedling pots.
  • I LOVE this serrated garden knife from Barnel. It is great for harvesting greens, removing diseased leaves from plants and chopping weeds off at the soil line.
  • Large dish bins, usually available at restaurant supply stores, are great to have on hand. You can use them for mixing and storing potting soil, for transporting vegetable transplants from the nursery in your car, or for carrying supplies to the garden.

Sun Protection

Garden Bling

Garden bling like a birdbath, a decorative sign, metal artwork, plant labels, sun catchers or other decor that match the gardener’s personality make great gifts for the vegetable gardener.

Gift Memberships

Consider a membership to a local garden or gardening organization. Two examples are the Lady Bird Johnson Wildflower Center or the American Horticultural Society. Both offer reciprocal admissions to beautiful public gardens across the country.

A sturdy plastic bin, gardening books, ergonomic hand tools, metal plant stakes and other tools A sturdy plastic bin, gardening books, and other tools help make gardening more fun and successful.

Additional Resources

Recommended Vegetable Varieties for Travis County

Vegetable Seed Sources

Vegetable Gardening in Austin

Sustainable Food Center Farmers Markets

Texas Farmers Markets

In the Vegetable Garden with Patty G. Leander


Patty G. Leander is a contributing editor for Texas Gardener magazine and an active member of the Travis County Master Gardener Association with an Advanced Master Gardener specialty in vegetables. She has been growing vegetables year-round in her Austin garden for over 20 years, encouraging the use of sound, horticultural principles that will lead to a bountiful harvest.

In the December Vegetable Garden by Patty Leander

AgriLife Logo

Time for Greens and Pomegranates

Your December garden checklist is here and ‘tis the season for fresh broccoli, cauliflower, hearty greens, delicious citrus…and pomegranates!

Hold a pomegranate half, seed side down, over a bowl and whack it several times to remove seeds as part of your December Garden Checklist

Hold a pomegranate half, seed side down, over a bowl and whack it several times to remove seeds.

It’s hard to resist the beautiful pomegranates available this time of year. The ruby red arils add a pop of color and a little tangy sweetness to salads, pilafs, or even sprinkled atop a dish of Christmas guacamole. If you’ve been to the grocery store lately, you’ve undoubtedly noticed pomegranates prominently displayed in the produce section. Or perhaps you are lucky enough to have your own tree.

The exotic nature of the pomegranate can be a bit confounding when it’s time to liberate those juicy seeds. A long-time recommendation is to cut the pomegranate in half or quarters and turn them inside out into a bowl of water to release the seeds. But there’s an easier way – paddle your pomegranate! Cut the pomegranate in half and hold it over a wide bowl, cup it upside down in your hand and whack it – again and again – with a sturdy spoon. The arils pop right out and fall into the bowl. Here is a helpful video demonstration from Jamie Oliver.

Drier Weather = More Irrigating

Summer just didn’t want to let go this year but finally we are in the zone for cool season gardening. November brought mild and sunny days followed by cool and comfortable nights. These blissful days almost make me forget that we haven’t had significant rain lately, so be sure to put irrigating on your December garden checklist. An inch of water per week, enough to wet the soil 3-4 inches below the surface, should be sufficient.

The average first frost for Central Texas usually hits in early December. However, weather forecasters say that we are in a La Niña cycle which means that winter will likely be warmer and drier than normal. One of the local meteorologists is even calling for shorts and flip flops for Christmas! Of course, the possibility of freezes still exists but hopefully we will avoid freezing temperatures that are cold enough to damage unprotected hoses, pipes and plants.

December Garden Checklist

Here is the vegetable gardener’s checklist for December:

Fertilize

  • Fertilize vegetables in containers with a water-soluble fertilizer and spread a layer of leaves or mulch over the soil surface.

Water

  • Continue to irrigate vegetables during dry periods. Monitor even if you get a little rain.

Plant

  • Mid-month is a good time to seed broccoli, cabbage, cauliflower, Swiss chard and spinach indoors under grow lights so they will be ready for transplanting in January. It takes about 6 weeks to grow a good-sized transplant.
  • Dixondale Farms is a family-owned, 100-year-old Texas company that specializes in onion transplants. Check out their onion varieties at the Dixondale Farms website (www.dixondalefarms.com) and order transplants for setting out in January. Short day varieties, including ‘Texas Legend’ and ‘1015Y’, grow best in Central Texas gardens.

Soil

  • Use mild days to turn compost and add mulch where needed. Try to use looser mulches that allow rainwater to reach the soil or pull the material to the edge of the plant drip line.

Harvest

  • Keep lettuce, collards, kale and other greens growing all winter by harvesting leaves from the outer perimeter of the plant so that the crown remains intact and the inner portion of the plant will continue growing. Alternatively, the entire plant can be harvested once the leaves have reached their mature size.
  • After cutting your first head of broccoli, leave the plants in the ground and they will continue to produce delicious side shoots.

    Broccoli left in ground after harvest will grow side shoots

    After cutting your first head of broccoli, leave the plants in the ground and they will continue to produce delicious side shoots.

  • Cut or twist the leafy tops off of turnips, beets, radishes and carrots before storing and don’t overlook the culinary potential of those leafy greens. They are totally edible and nutritious, and their pungent bite is tempered when chopped up and incorporated into soups, casseroles, vegetable sautés or dips.

Maintenance

  • Seed catalogs for 2021 should be arriving soon. Inventory your seed supply and order new varieties for the upcoming spring season.
  • Take advantage of December’s slower pace to organize garden supplies, clean tools, wash gloves, chunk the junk and repurpose, repair or recycle unused garden gear. If needed take equipment such as tillers, trimmers or mowers in for maintenance or repairs.
  • Evaluate your garden successes and failures of the past year. Think about changes or improvements you need to make for 2021.

Enjoy!

Butternut squash in slow cooker

Cook whole butternut and other winter squashes in a slow-cooker when a recipe calls for mashed or puréed squash.

  • Try the hands-off version of cooking smaller-sized winter squash in a slow cooker. Place a washed, uncut squash, such as butternut or kabocha, in the slow cooker. Cook on low for 6-8 hours, cool slightly, then scoop out seeds, scrape flesh from skin and mash or purée.
  • Be sure to eat a hearty bowl of black-eyed peas (for good luck) and collard greens (for prosperity) on New Year’s Day. Let’s hope that 2021 will finally bring an end to COVID-related isolation.

Additional Resources

Recommended Vegetable Varieties for Travis County

Vegetable Seed Sources

Vegetable Gardening in Austin

Sustainable Food Center Farmers Markets

Texas Farmers Markets

Monthly Gardening Calendar for Austin and Central Texas

In the Vegetable Garden with Patty G. Leander


Patty G. Leander is a contributing editor for Texas Gardener magazine and an active member of the Travis County Master Gardener Association with an Advanced Master Gardener specialty in vegetables. She has been growing vegetables year-round in her Austin garden for over 20 years, encouraging the use of sound, horticultural principles that will lead to a bountiful harvest.

Ornamental Grasses – the Perfect Plants? by Linda Drga

AgriLife Logo

The Many Virtues of Ornamental Grasses

Ornamental grass planting bed

Ornamental grasses work well as mass plantings

A good landscape is not just about where you put trees and walkways, it also provides beauty and attracts nature into your yard. As the seasons change so does the color and shape of your garden. Spring brings a burst of new growth. Hopefully in summer there is a variety of flowers and grasses blooming. By fall, late blooms and seeds appear and last through most of the winter. Plants that can do all of this are ornamental grasses.

Additionally, as our Austin weather becomes hotter and drier, drought tolerant plants will be a necessary component of our gardens. Here again, the grasses come to the rescue. Ornamental grasses can handle drought, are low maintenance, attract birds and butterflies, are deer and pest resistant, provide both visual and auditory interest, and remain beautiful for many years.

Growing Conditions for Ornamental Grasses

Depending on your nature, you can either coddle your plants or select plants that can stand on their own in our climate. By starting with native, more adaptable grass, the constant care is not necessary. You can use ornamental grasses to help reduce or eliminate the labor and water intensive lawn without giving up a lush green space.

Most ornamental grasses prefer a sunny, well-drained soil, and are somewhat drought tolerant. Fall and spring are the best times to plant them. Control weeds to give the grass a chance to established itself. Provide light irrigation and mulch the first summer. Subsequent years will be more drought and weed tolerant.

Few grasses prefer shade, one good exception is the shade loving native Inland Sea Oats, (Chasmanthium latifolium). These grasses show long, graceful, arching seed heads which self-seed easily and are sought after by mammals and birds.

Purpose

Texas Sedge used as a lawn replacement

Texas Sedge, (Carex texensis), is a small clump-forming grass.

Do not mow or walk on your ornamental grasses – even if you are using them as a lawn substitute. Their purpose is to be beautiful, encourage wildlife, and add interest to the landscape. The varieties, shapes, color, and height make finding just the right grass for your purpose a fun study to undertake. Some grasses make beautiful container plants when considering the filler, spiller and thriller idea of container gardening.

Types of Ornamental Grasses to Use

Most references describe ornamental grasses by their root system: clump-forming or running. Nearly all have an upright form, no matter how their roots grow.

Choosing clump-forming grasses and their controlled and tidy growth habit provide contrast and additional interest in the landscape. Both tightly mounded or loose and open varieties are available. Clumps can be small or large depending on the mature height and width of the plant.

Running root systems often characterize grasses native to meadows or prairies. These ornamental grasses form rhizomes or stolons that can extend laterally 12 or more inches.

Design Uses for Ornamental Grasses

With so many grasses that grow well in our more arid climate, you can find varieties to use as ground cover, specimen plants, or combined with other native and nonnative varieties. Grasses make good background plants in a bed or as a filler in large landscape areas. They retain soil to prevent erosion. Most types of grasses are perennials which show subtle color, textures and bring movement. Consider dwarf varieties if you have space limitations.

Ornamental grasses provide contrast to perennials and annuals. Used in borders or beds, they provide movement when the wind blows. Use low grasses in the front of beds or edging along a path. Use towering tall grasses as a focal point or in the background for additional interest and layering. Texture, especially in a delicate grass, can create a calm, restful sensation.

Wildlife Uses

In the fall, the ornamental grasses start to shine providing another dimension to the landscape. Grasses show their graceful arching leaves in autumn when seeds emerge providing beauty all through the winter. This is also a time when birds show most interest in seeds. Grass planted in groups of two or three will allow a bird to hide if necessary. Place a birdbath near the native grass with seed heads as birds prefer the native grass and will be enticed to explore. The grass not only provides food but also a safe resting place and nesting. Birds are most vulnerable to marauders when feeding.

Maintenance

Cut back ornamental grasses after the first freeze or before they show new growth in the spring. Trimming is not necessary, but the plant will look better without all the dead leaves.

Grasses once established need little care but do not neglect them at least the first year as they will need supplemental water the first summer.

Other maintenance includes repotting or dividing the plant every three to four years to help it stay vigorous and healthy. Dividing also provides more plants for your garden or to share with friends. To divide a large grass cut down through middle with a spade into the shoots and roots. Dividing requires some strength so sometimes help is needed to cut through the roots. Once the extra plant is removed fill in the hole with soil and compost.

Additional Resources

Best Ornamental Grasses for Birds

Earth-Kind Landscaping Grass Selection for Region F

Waterwise Landscaping

November Gardening Checklist


Linda Drga is a Lifetime Member of the Travis County Master Gardeners Association. She grew up on a Pennsylvania truck farm and spent her youth working with vegetables. She has a degree in nursing and a MPH (Masters in Public Health) from Tulane. She spent 20+ years living and gardening in South American, the Caribbean, and Africa. She says gardening is her escape and how she keeps her mind at ease. She loves to get dirty in her garden but still dedicates time every day to study and learn something new.

Fall gardening in a drought? Yes! by Caroline Homer

AgriLife Logo

Texas in Drought Again (Still, Always)

From Drought to Deluge book cover
It’s mid-November and my garden is as dry as a tumbleweed rolling down 290 West toward Junction. My yard has received less than 3/4 inch of rain in the past two months. Nearly everyone in Austin got a good soaking in the second week of September. But my garden hasn’t seen much more than a brief shower or two since.
US Drought Monitor map for Texas as of November 10.
Meteorologists confirm that Central Texas is in a “flash drought.” This means we’ve moved through at least two drought classification categories in a four-week period, as reported by the U.S. Drought Monitor. Travis County has gone from no areas of drought in October to Moderate Drought across the county in November. Williamson and Bastrop County gardeners are starting to see areas of Severe Drought develop and spread.

Fall is Best Time to Plant

The showy foliage of Tradescantia spp. endures through drought and deluge.

The showy foliage of Tradescantia spp. endures through drought and deluge.

Despite the droughty conditions, fall is the very best time to plant trees, shrubs and perennials. Cooler temperatures allow root systems to become well-established well in advance of the next hot summer. Once established, these Texas-tough plants should not only survive but thrive with little to no watering. Even better, when rains return, they’ll easily rebound without drowning in the deluge.

Help is Here!

Skyflower (Duranta erecta), a tropical plant adapted to Central Texas, blooms from summer to first frost.

Skyflower (Duranta erecta), a tropical plant adapted to Central Texas, blooms from summer to first frost.

Starting off fall with a drought is the perfect time for the Travis County Master Gardeners Association to release their fully updated book, From Drought to Deluge: The Resilient Central Texas Garden. I love this book. (I am the co-editor of this edition, and will admit some bias.) As I worked on fact-checking, referencing, rewriting, and proofreading every word, I learned so much about Xeriscaping, our climate and our soils, the plants that excel here (and why), smart irrigation (hydrozones!) and rainwater harvesting, dealing with pests and weeds safely and effectively, and so much more.

We streamlined the book by removing the endless pages of plant lists and replaced them with online resources that offer more information on native and adapted plants than any book could ever include, making the new edition much easier to read and navigate. Every section of the book anchors on Xeriscaping principles which address drought while protecting our aquifers and watersheds from unnecessary use of pesticides and fertilizers. You can use the notations to take a deeper dive into the facts and figures.

A car full of new shade loving plants to install, Ligularia, Carex phyllocephala 'Sparkler' and Justicia spicigera.

New shade-loving perennials to be installed in Caroline’s yard: Ligularia, Carex phyllocephala ‘Sparkler’ and Justicia spicigera.

A front yard weeded, mulched and ready for replanting.

Caroline’s shady front yard, stripped of its long-suffering sun-loving perennials, weeded, mulched and ready for replanting.

I’ve found the information in this book invaluable during my own front yard overhaul this fall. I know I’ll need to water my new landscape a little more frequently during the current La Niña weather pattern, for example.

Local bookstores and independent nurseries will have copies of From Drought to Deluge: The Resilient Central Texas Garden in stock soon, but if you don’t want to wait, order a copy online now at https://www.tcmastergardeners.org/drought-guide/.

This drought, too, shall pass. Let’s get to gardening!

Additional Resources

Native & Adapted Plant Guide Searchable Database

Earth-Kind® Low Volume Irrigation Guide

Making a Rain Barrel

Soils and Composting for Austin

AgriLife Today article on From Drought to Deluge: The Resilient Central Texas Garden

Interview on Central Texas Gardener

Caroline Homer

Caroline Homer has been a Registered Dietitian for over 30 years and a Travis County Texas Master Gardener since 2012. She’s been gardening for 15 years in Austin, growing everything from Asparagus to Zucchini and Agave to Zinnia. In addition to gardening, Caroline enjoys writing, photography, and word games.

Paperwhite Daffodil Bulbs for the Holidays by Yvonne Schneider

AgriLife Logo

Start Now for Holiday Blooms

Blooming paperwhite daffodil bulbs in an indoor container

Last year I planted Paperwhite daffodil bulbs (Narcissus papyraceus) in my mother’s yard in the Houston area, as well as in a container for enjoyment on the patio. Paperwhites are highly fragrant blooms, similar to a gardenia, and rise to approximately 12-18 inches in height, so a great joy to have indoors or out in the garden.

Even though Paperwhite bulbs are inexpensive and easy to find, I had nearly forgotten I had stored a few bulbs to see how well they would survive for another container planting.

Paperwhite daffodil bulbs stored in gritty potting soil

Store paperwhite bulbs in old potting soil or shredded newspaper.

I kept the bulbs in a bed of peat moss and vermiculite, and was happy to see that five of the seven bulbs were still firm, a sign of health. Since now is a good time to think about blooms during the holidays, I decided to put together a container. Paperwhites are quick blooming, only requiring four to five weeks when grown indoors.

Differences in Planting

Daffodil bulbs planted with bulb tips just above the soil line

Plant with bulb tips just above the soil line.

The two key differences in planting Paperwhite daffodil bulbs in a container instead of in the ground are the spacing and timing. In the ground Paperwhite bulbs are planted 4-6 inches deep and 4-6 inches apart and normally planted in late winter for spring blooms. In the Austin area, Paperwhites can be planted in the ground as early as late fall since we have warmer winters. Focusing on container planting, you can ignore any rules about spacing and depth (for the most part). As for timing, a good rule of thumb is you can force blooms indoors anytime between November and March.

Materials List

  • Gloves
  • Potting soil
  • One or more containers wide enough to fit the desired number of bulbs

Aesthetically, an odd number of bulbs is best. The potting soil should be rich and well-draining, so look for potting soil recommended for indoor containers. Your container needs to be deep enough to allow for 2-3 inches of potting soil below the bulb. Place the bulbs on top of the soil with the pointed side up, so that the tips of the bulbs appear just above the top of the container. For spacing, place the bulbs one inch apart, or touching if you want a fuller look. Fill in with the potting soil ensuring the tips remain slightly exposed. Water the bulbs in and put in a bright sunny location. Keep the bulbs slightly moist, but not wet, so as not to allow the bulbs to rot. In 4 to 5 weeks, your blooms should be ready for the show!

Alternate Potting Medium

If you prefer a unique look, use pebbles or glass stones as the growing medium. Simply substitute the soil and use 2-3 inches of pebbles in the bottom of a tall glass container. A tall container is best to provide support for the stems, and to avoid flopping blooms. Alternatively, add a support mechanism (stick, decorative stake) in the pebbles as support.Bulbs planted in a glass jar with pebbles instead of soil

Next, place each bulb an inch apart sitting on top of the pebbles. Ensure the pointed side of the bulb is upward facing. Once all bulbs are placed, add water until the pebbles are barely covered, so that the bulb is not sitting in the water. Within a couple of weeks, you will see the roots emerge and begin growing within the pebbles. Check the water at least weekly and replenish so that the stones remain covered, but the water does not touch the bulb. By week 4 or 5, your blooms will be ready to be a focal point in any holiday decoration or table.

Naturalizing Paperwhite Daffodil Bulbs

Best suited for zones 9-10, Austin is a great location to naturalize Paperwhites, as they do not have required chilling hours, as do other daffodil bulbs. Allow the foliage to yellow and die back before cutting, as this enables the foliage to nourish the bulb for next year’s blooms. Since the foliage goes fully dormant during the summer, no additional watering is necessary and if located in an area with excessive water, the bulb can rot. If in a container, refrain from watering after the bulb has gone dormant and put it away in a cool dark place (such as a garage) until next spring. Or, if you’ve enjoyed the blooms for the holidays, you still have time to plant them in the ground in late winter for future shows in your garden!

Additional Resources

Bulbs for Central Texas

November Gardening Checklist

Yvonne Schneider, guest blogger

Yvonne was a 35+year veteran in the computer and information technology industry when she retired and moved from Houston to the Austin area. In 2018, Yvonne certified as a Travis County Texas Master Gardener to follow her passion for gardening and volunteering within the community. She has spent 20+ years enjoying gardening and working with bulbs and perennials. She now tackles the challenges presented by the Austin area wildlife, drought, and limestone soil.

No Rain Barrel? No Problem! Harvest Rainwater Simply by Liz Caskey

AgriLife Logo

New to Rainwater Harvesting?

You don’t need to purchase a premade barrel or install a full capture system to harvest rainwater. A great first step to collect rainwater for your garden is to use pans, buckets, or any empty drink container.

Buckets and an old tea pot used to harvest rainwater

Any clean container can be used to capture rainwater.

I can tell a difference in my plants when I water them with rainwater, since it does not include the chemicals found in tap water. I prefer to use rainwater on my decorative plants and vegetables. My Japanese Maples especially like it, since they seem to be particularly sensitive.

Any Clean Container Will Do

Harvest rainwater using rain chains to direct water from eaves

Rain chains hang from eaves and guide roof water to a designated spot

Any clean container can be used to collect rain from rooftops, such as buckets, pans, even garbage cans. During the next rain, look at your roof for points of heaviest rainfall run off. You can gather your containers into one area or spread them out in each area that has run off. Since I don’t have gutters, I scouted my roofline to see where the rainwater was heaviest. In one area, I added a decorative rain chain to guide the rainfall to its collection point. And remember, it doesn’t have to be from your house. Check your greenhouse or shed for rainwater run off too, all can be used to harvest rainwater.

After a rain, I like to consolidate my rainwater into a small trash can. Then, when I’m ready to use it, I add a liquid organic fertilizer. I then put the mixture into a watering can or a recycled milk jug to water my plants.

Prevent Mosquitoes

Mosquito dunks contain bt, that kills mosquito larva. It is not toxic to anything else.

Mosquito dunks or granules, as shown here, contain bt to kill mosquito larva. It is not toxic to anything else.

Mosquito Granules contain bt to kill mosquito larva. It is not toxic to anything else.
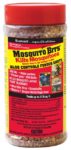
To prevent mosquitos, I add BTI (Bacillus thuringiensis israelensis) in the form of mosquito dunks or granules into the water as soon as it is collected. BTI is deadly only to mosquitos and will not harm other wildlife or pets. You can purchase them at most big box stores, garden centers, or online.

Once you start collecting a bit of rainwater, I’m sure you’ll be hooked and will want to advance to rain barrels!

Additional Resources

Grow Green Fact Sheets on Cisterns, Mosquitos, and Rain Gardens

Making a Rain Barrel

Build Your Own Rain Barrel

Texas Sales & Use Tax Exemption Certificate
(Per the State of Texas tax code, equipment and supplies purchased solely for capturing and storing rainwater are exempt from sales tax; present the Tax Exemption Certificate to merchants to receive the sales tax exemption)

Waterwise Landscaping

November Gardening Checklist


Liz Caskey

Liz Caskey will celebrate 25 years as a master gardener in 2021 and has completed Rain Water Harvester Advanced Training. She enjoys growing vegetables and begonias, although she’s hardly ever met a plant she doesn’t love.